The Debian operating system is what I have been using on my main computer for what is probably around 20 years. I am now in the process of installing the hopefully soon released Debian 11 “bullseye” on my Lenovo X201 laptop. Getting a OpenPGP smartcard to work has almost always required some additional effort, but it has been reliable enough to use exclusively for my daily GnuPG and SSH operations since 2006. In the early days, the issues with smartcards were not related to GNOME, see my smartcard notes for Debian 4 Etch for example. I believe with Debian 5 Lenny, Debian 6 Squeeze, and Debian 7 Stretch things just worked without workarounds, even with GNOME. Those were the golden days! Back in 2015, with Debian 8 Jessie I noticed a regression and came up with a workaround. The problems in GNOME were not fixed, and I wrote about how to work around this for Debian 9 Stretch and the slightly different workaround needed for Debian 10 Buster. What will Bullseye be like?
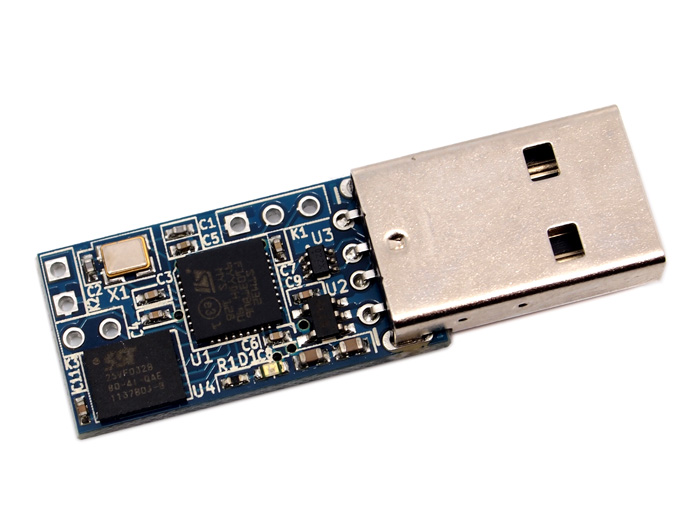
The first impression of working with GnuPG and a smartcard is still the same. After inserting the GNUK that holds my private keys into my laptop, nothing happens by default and attempting to access the smartcard results in the following.
jas@latte:~$ gpg --card-status
gpg: error getting version from 'scdaemon': No SmartCard daemon
gpg: OpenPGP card not available: No SmartCard daemon
jas@latte:~$
The solution is to install the scdaemon package. My opinion is that either something should offer to install it when the device is inserted (wasn’t there a framework for discovering hardware and installing the right packages?) or this package should always be installed for a desktop system. Anyway, the following solves the problem.
jas@latte:~$ sudo apt install scdaemon
...
jas@latte:~$ gpg --card-status
 Reader ………..: 234B:0000:FSIJ-1.2.14-67252015:0
 Application ID …: D276000124010200FFFE672520150000
...
 URL of public key : https://josefsson.org/key-20190320.txt
...
Before the private key in the smartcard can be used, the public key must be imported into GnuPG. I now believe the best way to do this (see earlier posts for alternatives) is to configure the smartcard with a public key URL and retrieve it as follows.
jas@latte:~$ gpg --card-edit
 Reader ………..: 234B:0000:FSIJ-1.2.14-67252015:0
...
 gpg/card> fetch
 gpg: requesting key from 'https://josefsson.org/key-20190320.txt'
 gpg: key D73CF638C53C06BE: public key "Simon Josefsson simon@josefsson.org" imported
 gpg: Total number processed: 1
 gpg:               imported: 1
 gpg/card> quit
jas@latte:~$ gpg -K
 /home/jas/.gnupg/pubring.kbx
 sec#  ed25519 2019-03-20 [SC] [expires: 2021-08-21]
       B1D2BD1375BECB784CF4F8C4D73CF638C53C06BE
 uid           [ unknown] Simon Josefsson simon@josefsson.org
 ssb>  ed25519 2019-03-20 [A] [expires: 2021-08-21]
 ssb>  ed25519 2019-03-20 [S] [expires: 2021-08-21]
 ssb>  cv25519 2019-03-20 [E] [expires: 2021-08-21]
jas@latte:~$
The next step is to mark your own key as ultimately trusted, use the fingerprint shown above together with gpg --import-ownertrust. Warning! This is not the general way to remove the warning about untrusted keys, this method should only be used for your own keys.
jas@latte:~$ echo "B1D2BD1375BECB784CF4F8C4D73CF638C53C06BE:6:" | gpg --import-ownertrust
gpg: inserting ownertrust of 6
jas@latte:~$ gpg -K
gpg: checking the trustdb
gpg: marginals needed: 3  completes needed: 1  trust model: pgp
gpg: depth: 0  valid:   1  signed:   0  trust: 0-, 0q, 0n, 0m, 0f, 1u
gpg: next trustdb check due at 2021-08-21
 /home/jas/.gnupg/pubring.kbx
sec#  ed25519 2019-03-20 [SC] [expires: 2021-08-21]
       B1D2BD1375BECB784CF4F8C4D73CF638C53C06BE
uid           [ultimate] Simon Josefsson simon@josefsson.org
ssb>  cv25519 2019-03-20 [E] [expires: 2021-08-21]
ssb>  ed25519 2019-03-20 [A] [expires: 2021-08-21]
ssb>  ed25519 2019-03-20 [S] [expires: 2021-08-21]
jas@latte:~$
Now GnuPG is able to both sign, encrypt, and decrypt data:
jas@latte:~$ echo foo|gpg -a --sign|gpg --verify
 gpg: Signature made Sat May  1 16:02:49 2021 CEST
 gpg:                using EDDSA key A3CC9C870B9D310ABAD4CF2F51722B08FE4745A2
 gpg: Good signature from "Simon Josefsson simon@josefsson.org" [ultimate]
 jas@latte:~$ echo foo|gpg -a --encrypt -r simon@josefsson.org|gpg --decrypt
 gpg: encrypted with 256-bit ECDH key, ID 02923D7EE76EBD60, created 2019-03-20
       "Simon Josefsson simon@josefsson.org"
 foo
jas@latte:~$
To make SSH work with the smartcard, the following is the GNOME-related workaround that is still required. The problem is that the GNOME keyring enables its own incomplete SSH-agent implementation. It is lacking the smartcard support that the GnuPG agent can provide, and even set the SSH_AUTH_SOCK environment variable if the enable-ssh-support parameter is provided.
jas@latte:~$ ssh-add -L
 The agent has no identities.
jas@latte:~$ echo $SSH_AUTH_SOCK
 /run/user/1000/keyring/ssh
jas@latte:~$ mkdir -p ~/.config/autostart
jas@latte:~$ cp /etc/xdg/autostart/gnome-keyring-ssh.desktop ~/.config/autostart/
jas@latte:~$ echo 'Hidden=true' >> .config/autostart/gnome-keyring-ssh.desktop
jas@latte:~$ echo enable-ssh-support >> ~/.gnupg/gpg-agent.conf
For some reason, it does not seem sufficient to log out of GNOME and then login again. Most likely some daemon is still running, that has to be restarted. At this point, I reboot my laptop and then log into GNOME again. Finally it looks correct:
jas@latte:~$ echo $SSH_AUTH_SOCK
 /run/user/1000/gnupg/S.gpg-agent.ssh
jas@latte:~$ ssh-add -L
 ssh-ed25519 AAAAC3NzaC1lZDI1NTE5AAAAILzCFcHHrKzVSPDDarZPYqn89H5TPaxwcORgRg+4DagE cardno:FFFE67252015
jas@latte:~$
Please discuss in small groups the following topics:
- How should the
scdaemonpackage be installed more automatically? - Should there a simple command to retrieve the public key for a smartcard and set it as ultimately trusted? The two step
--card-editand--import-ownertruststeps is a bad user interface and is not intuitive in my opinion. - Why is GNOME keyring used for SSH keys instead of
ssh-agent/gpg-agent? - Should
gpg-agenthaveenable-ssh-supporton by default?
After these years, I would probably feel a bit of sadness if the problems were fixed, since then I wouldn’t be able to rant about this problem and celebrate installing Debian 12 Bookworm the same way I have done for the some past releases.
Thanks for reading and happy hacking!