Apt Archive Transparency: debdistdiff & apt-canary

I’ve always found the operation of apt software package repositories to be a mystery. There appears to be a lack of transparency into which people have access to important apt package repositories out there, how the automatic non-human update mechanism is implemented, and what changes are published. I’m thinking of big distributions like Ubuntu and Debian, but also the free GNU/Linux distributions like Trisquel and PureOS that are derived from the more well-known distributions.

As far as I can tell, anyone who has the OpenPGP private key trusted by a apt-based GNU/Linux distribution can sign a modified Release/InRelease file and if my machine somehow downloads that version of the release file, my machine could be made to download and install packages that the distribution didn’t intend me to install. Further, it seems that anyone who has access to the main HTTP server, or any of its mirrors, or is anywhere on the network between them and my machine (when plaintext HTTP is used), can either stall security updates on my machine (on a per-IP basis), or use it to send my machine (again, on a per-IP basis to avoid detection) a modified Release/InRelease file if they had been able to obtain the private signing key for the archive. These are mighty powers that warrant overview.

I’ve always put off learning about the processes to protect the apt infrastructure, mentally filing it under “so many people rely on this infrastructure that enough people are likely to have invested time reviewing and improving these processes”. Simultaneous, I’ve always followed the more free-software friendly Debian-derived distributions such as gNewSense and have run it on some machines. I’ve never put them into serious production use, because the trust issues with their apt package repositories has been a big question mark for me. The “enough people” part of my rationale for deferring this is not convincing. Even the simple question of “is someone updating the apt repository” is not easy to understand on a running gNewSense system. At some point in time the gNewSense cron job to pull in security updates from Debian must have stopped working, and I wouldn’t have had any good mechanism to notice that. Most likely it happened without any public announcement. I’ve recently switched to Trisquel on production machines, and these questions has come back to haunt me.

The situation is unsatisfying and I looked into what could be done to improve it. I could try to understand who are the key people involved in each project, and may even learn what hardware component is used, or what software is involved to update and sign apt repositories. Is the server running non-free software? Proprietary BIOS or NIC firmware? Are the GnuPG private keys on disk? Smartcard? TPM? YubiKey? HSM? Where is the server co-located, and who has access to it? I tried to do a bit of this, and discovered things like Trisquel having a DSA1024 key in its default apt trust store (although for fairness, it seems that apt by default does not trust such signatures). However, I’m not certain understanding this more would scale to securing my machines against attacks on this infrastructure. Even people with the best intentions, and the state of the art hardware and software, will have problems.

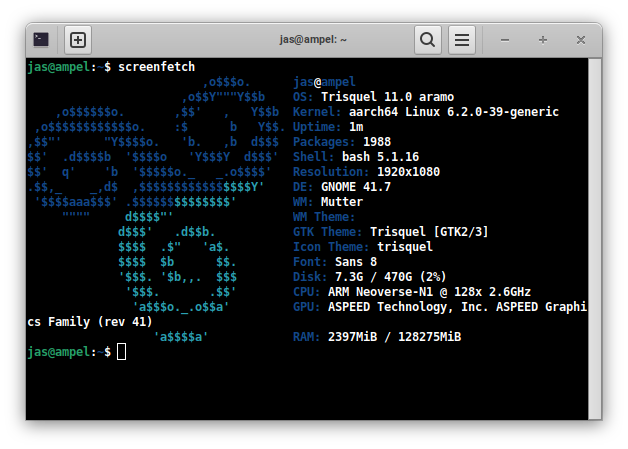
To increase my trust in Trisquel I set out to understand how it worked. To make it easier to sort out what the interesting parts of the Trisquel archive to audit further were, I created debdistdiff to produce human readable text output comparing one apt archive with another apt archive. There is a GitLab CI/CD cron job that runs this every day, producing output comparing Trisquel vs Ubuntu and PureOS vs Debian. Working with these output files has made me learn more about how the process works, and I even stumbled upon something that is likely a bug where Trisquel aramo was imported from Ubuntu jammy while it contained a couple of package (e.g., gcc-8, python3.9) that were removed for the final Ubuntu jammy release.

After working on auditing the Trisquel archive manually that way, I realized that whatever I could tell from comparing Trisquel with Ubuntu, it would only be something based on a current snapshot of the archives. Tomorrow it may look completely different. What felt necessary was to audit the differences of the Trisquel archive continously. I was quite happy to have developed debdistdiff for one purpose (comparing two different archives like Trisquel and Ubuntu) and discovered that the tool could be used for another purpose (comparing the Trisquel archive at two different points in time). At this time I realized that I needed a log of all different apt archive metadata to be able to produce an audit log of the differences in time for the archive. I create manually curated git-repositories with the Release/InRelease and the Packages files for each architecture/component of the well-known distributions Trisquel, Ubuntu, Debian and PureOS. Eventually I wrote scripts to automate this, which are now published in the debdistget project.

At this point, one of the early question about per-IP substitution of Release files were lingering in my mind. However with the tooling I now had available, coming up with a way to resolve this was simple! Merely have apt compute a SHA256 checksum of the just downloaded InRelease file, and see if my git repository had the same file. At this point I started reading the Apt source code, and now I had more doubts about the security of my systems than I ever had before. Oh boy how the name Apt has never before felt more… Apt?! Oh well, we must leave some exercises for the students. Eventually I realized I wanted to touch as little of apt code basis as possible, and noticed the SigVerify::CopyAndVerify function called ExecGPGV which called apt-key verify which called GnuPG’s gpgv. By setting Apt::Key::gpgvcommand I could get apt-key verify to call another tool than gpgv. See where I’m going? I thought wrapping this up would now be trivial but for some reason the hash checksum I computed locally never matched what was on my server. I gave up and started working on other things instead.

Today I came back to this idea, and started to debug exactly how the local files looked that I got from apt and how they differed from what I had in my git repositories, that came straight from the apt archives. Eventually I traced this back to SplitClearSignedFile which takes an InRelease file and splits it into two files, probably mimicking the (old?) way of distributing both Release and Release.gpg. So the clearsigned InRelease file is split into one cleartext file (similar to the Release file) and one OpenPGP signature file (similar to the Release.gpg file). But why didn’t the cleartext variant of the InRelease file hash to the same value as the hash of the Release file? Sadly they differ by the final newline.

Having solved this technicality, wrapping the pieces up was easy, and I came up with a project apt-canary that provides a script apt-canary-gpgv that verify the local apt release files against something I call a “apt canary witness” file stored at a URL somewhere.

I’m now running apt-canary on my Trisquel aramo laptop, a Trisquel nabia server, and Talos II ppc64el Debian machine. This means I have solved the per-IP substitution worries (or at least made them less likely to occur, having to send the same malicious release files to both GitLab and my system), and allow me to have an audit log of all release files that I actually use for installing and downloading packages.

What do you think? There are clearly a lot of work and improvements to be made. This is a proof-of-concept implementation of an idea, but instead of refining it until perfection and delaying feedback, I wanted to publish this to get others to think about the problems and various ways to resolve them.

Btw, I’m going to be at FOSDEM’23 this weekend, helping to manage the Security Devroom. Catch me if you want to chat about this or other things. Happy Hacking!

Understanding Trisquel

Ever wondered how Trisquel and Ubuntu differs and what’s behind the curtain from a developer perspective? I have. Sharing what I’ve learnt will allow you to increase knowledge and trust in Trisquel too.

Trisquel GNU/Linux logo

The scripts to convert an Ubuntu archive into a Trisquel archive are available in the ubuntu-purge repository. The easy to read purge-focal script lists the packages to remove from Ubuntu 20.04 Focal when it is imported into Trisquel 10.0 Nabia. The purge-jammy script provides the same for Ubuntu 22.04 Jammy and (the not yet released) Trisquel 11.0 Aramo. The list of packages is interesting, and by researching the reasons for each exclusion you can learn a lot about different attitudes towards free software and understand the desire to improve matters. I wish there were a wiki-page that for each removed package summarized relevant links to earlier discussions. At the end of the script there is a bunch of packages that are removed for branding purposes that are less interesting to review.

Trisquel adds a couple of Trisquel-specific packages. The source code for these packages are in the trisquel-packages repository, with sub-directories for each release: see 10.0/ for Nabia and 11.0/ for Aramo. These packages appears to be mostly for branding purposes.

Trisquel modify a set of packages, and here is starts to get interesting. Probably the most important package to modify is to use GNU Linux-libre instead of Linux as the kernel. The scripts to modify packages are in the package-helpers repository. The relevant scripts are in the helpers/ sub-directory. There is a branch for each Trisquel release, see helpers/ for Nabia and helpers/ for Aramo. To see how Linux is replaced with Linux-libre you can read the make-linux script.

This covers the basic of approaching Trisquel from a developers perspective. As a user, I have identified some areas that need more work to improve trust in Trisquel:

  • Auditing the Trisquel archive to confirm that the intended changes covered above are the only changes that are published.
  • Rebuild all packages that were added or modified by Trisquel and publish diffoscope output comparing them to what’s in the Trisquel archive. The goal would be to have reproducible builds of all Trisquel-related packages.
  • Publish an audit log of the Trisquel archive to allow auditing of what packages are published. This boils down to trust of the OpenPGP key used to sign the Trisquel archive.
  • Trisquel archive mirror auditing to confirm that they are publishing only what comes from the official archive, and that they do so timely.

I hope to publish more about my work into these areas. Hopefully this will inspire similar efforts in related distributions like PureOS and the upstream distributions Ubuntu and Debian.

Happy hacking!

Preseeding Trisquel Virtual Machines Using “netinst” Images

I’m migrating some self-hosted virtual machines to Trisquel, and noticed that Trisquel does not offer cloud-images similar to the Debian Cloud and Ubuntu Cloud images. Thus my earlier approach based on virt-install --cloud-init and cloud-localds does not work with Trisquel. While I hope that Trisquel will eventually publish cloud-compatible images, I wanted to document an alternative approach for Trisquel based on preseeding. This is how I used to install Debian and Ubuntu in the old days, and the automated preseed method is best documented in the Debian installation manual. I was hoping to forget about the preseed format, but maybe it will become one of those legacy technologies that never really disappears? Like FAT16 and 8-bit microcontrollers.

Below I assume you have a virtual machine host server up that runs libvirt and has virt-install and similar tools; install them with the following command. I run Trisquel 11 aramo on my VM-host, but I believe any recent dpkg-based distribution like Trisquel 9/10, PureOS 10, Debian 11 or Ubuntu 20.04/22.04 would work with minor adjustments.

apt-get install libvirt-daemon-system virtinst genisoimage cloud-image-utils osinfo-db-tools

The approach can install Trisquel 9 (etiona), Trisquel 10 (nabia) and Trisquel 11 (aramo). First download and verify the integrity of the netinst images that we will need.

mkdir -p /root/iso
cd /root/iso
wget -q https://mirror.fsf.org/trisquel-images/trisquel-netinst_9.0.2_amd64.iso
wget -q https://mirror.fsf.org/trisquel-images/trisquel-netinst_9.0.2_amd64.iso.asc
wget -q https://mirror.fsf.org/trisquel-images/trisquel-netinst_9.0.2_amd64.iso.sha256
wget -q https://mirror.fsf.org/trisquel-images/trisquel-netinst_10.0.1_amd64.iso
wget -q https://mirror.fsf.org/trisquel-images/trisquel-netinst_10.0.1_amd64.iso.asc
wget -q https://mirror.fsf.org/trisquel-images/trisquel-netinst_10.0.1_amd64.iso.sha256
wget -q https://cdimage.trisquel.org/trisquel-images/trisquel-netinst_11.0_amd64.iso
wget -q https://cdimage.trisquel.org/trisquel-images/trisquel-netinst_11.0_amd64.iso.asc
wget -q https://cdimage.trisquel.org/trisquel-images/trisquel-netinst_11.0_amd64.iso.sha256
wget -q -O- https://archive.trisquel.info/trisquel/trisquel-archive-signkey.gpg | gpg --import
sha256sum -c trisquel-netinst_9.0.2_amd64.iso.sha256
gpg --verify trisquel-netinst_9.0.2_amd64.iso.asc
sha256sum -c trisquel-netinst_10.0.1_amd64.iso.sha256
gpg --verify trisquel-netinst_10.0.1_amd64.iso.asc
sha256sum -c trisquel-netinst_11.0_amd64.iso.sha256
gpg --verify trisquel-netinst_11.0_amd64.iso.asc

I have developed the following fairly minimal preseed file that works with all three Trisquel releases. Compare it against the official Trisquel 11 preseed skeleton and the Debian 11 example preseed file. You should modify obvious things like SSH key, host/IP settings, partition layout and decide for yourself how to deal with passwords. While Ubuntu/Trisquel usually wants to setup a user account, I prefer to login as root hence setting ‘passwd/root-login‘ to true and ‘passwd/make-user‘ to false.


root@trana:~# cat>trisquel.preseed 
d-i debian-installer/locale select en_US
d-i keyboard-configuration/xkb-keymap select us

d-i netcfg/choose_interface select auto
d-i netcfg/disable_autoconfig boolean true

d-i netcfg/get_ipaddress string 192.168.122.201
d-i netcfg/get_netmask string 255.255.255.0
d-i netcfg/get_gateway string 192.168.122.46
d-i netcfg/get_nameservers string 192.168.122.46

d-i netcfg/get_hostname string trisquel
d-i netcfg/get_domain string sjd.se

d-i clock-setup/utc boolean true
d-i time/zone string UTC

d-i mirror/country string manual
d-i mirror/http/hostname string ftp.acc.umu.se
d-i mirror/http/directory string /mirror/trisquel/packages
d-i mirror/http/proxy string

d-i partman-auto/method string regular
d-i partman-partitioning/confirm_write_new_label boolean true
d-i partman/choose_partition select finish
d-i partman/confirm boolean true
d-i partman/confirm_nooverwrite boolean true
d-i partman-basicfilesystems/no_swap boolean false
d-i partman-auto/expert_recipe string myroot :: 1000 50 -1 ext4 \
     $primary{ } $bootable{ } method{ format } \
     format{ } use_filesystem{ } filesystem{ ext4 } \
     mountpoint{ / } \
    .
d-i partman-auto/choose_recipe select myroot

d-i passwd/root-login boolean true
d-i user-setup/allow-password-weak boolean true
d-i passwd/root-password password r00tme
d-i passwd/root-password-again password r00tme
d-i passwd/make-user boolean false

tasksel tasksel/first multiselect
d-i pkgsel/include string openssh-server

popularity-contest popularity-contest/participate boolean false

d-i grub-installer/only_debian boolean true
d-i grub-installer/with_other_os boolean true
d-i grub-installer/bootdev string default

d-i finish-install/reboot_in_progress note

d-i preseed/late_command string mkdir /target/root/.ssh ; echo ssh-ed25519 AAAAC3NzaC1lZDI1NTE5AAAAILzCFcHHrKzVSPDDarZPYqn89H5TPaxwcORgRg+4DagE cardno:FFFE67252015 > /target/root/.ssh/authorized_keys
^D
root@trana:~# 

Use the file above as a skeleton for preparing a VM-specific preseed file as follows. The environment variables HOST and IPS will be used later on too.


root@trana:~# HOST=foo
root@trana:~# IP=192.168.122.197
root@trana:~# sed -e "s,get_ipaddress string.*,get_ipaddress string $IP," -e "s,get_hostname string.*,get_hostname string $HOST," < trisquel.preseed > vm-$HOST.preseed
root@trana:~# 

The following script is used to prepare the ISO images with the preseed file that we will need. This script is inspired by the Debian Wiki Preseed EditIso page and the Trisquel ISO customization wiki page. There are a couple of variations based on earlier works. Paths are updated to match the Trisquel netinst ISO layout, which differ slightly from Debian. We modify isolinux.cfg to boot the auto label without a timeout. On Trisquel 11 the auto boot label exists, but on Trisquel 9 and Trisquel 10 it does not exist so we add it in order to be able to start the automated preseed installation.


root@trana:~# cat gen-preseed-iso 
#!/bin/sh

# Copyright (C) 2018-2022 Simon Josefsson -- GPLv3+
# https://wiki.debian.org/DebianInstaller/Preseed/EditIso
# https://trisquel.info/en/wiki/customizing-trisquel-iso

set -e
set -x

ISO="$1"
PRESEED="$2"
OUTISO="$3"
LASTPWD="$PWD"

test -f "$ISO"
test -f "$PRESEED"
test ! -f "$OUTISO"

TMPDIR=$(mktemp -d)
mkdir "$TMPDIR/mnt"
mkdir "$TMPDIR/tmp"

cp "$PRESEED" "$TMPDIR"/preseed.cfg
cd "$TMPDIR"

mount "$ISO" mnt/
cp -rT mnt/ tmp/
umount mnt/

chmod +w -R tmp/
gunzip tmp/initrd.gz
echo preseed.cfg | cpio -H newc -o -A -F tmp/initrd
gzip tmp/initrd
chmod -w -R tmp/

sed -i "s/timeout 0/timeout 1/" tmp/isolinux.cfg
sed -i "s/default vesamenu.c32/default auto/" tmp/isolinux.cfg

if ! grep -q auto tmp/adtxt.cfg; then
    cat<<EOF >> tmp/adtxt.cfg
label auto
	menu label ^Automated install
	kernel linux
	append auto=true priority=critical vga=788 initrd=initrd.gz --- quiet
EOF
fi

cd tmp/
find -follow -type f | xargs md5sum  > md5sum.txt
cd ..

cd "$LASTPWD"

genisoimage -r -J -b isolinux.bin -c boot.cat \
            -no-emul-boot -boot-load-size 4 -boot-info-table \
            -o "$OUTISO" "$TMPDIR/tmp/"

rm -rf "$TMPDIR"

exit 0
^D
root@trana:~# chmod +x gen-preseed-iso 
root@trana:~# 

Next run the command on one of the downloaded ISO image and the generated preseed file.


root@trana:~# ./gen-preseed-iso /root/iso/trisquel-netinst_10.0.1_amd64.iso vm-$HOST.preseed vm-$HOST.iso
+ ISO=/root/iso/trisquel-netinst_10.0.1_amd64.iso
+ PRESEED=vm-foo.preseed
+ OUTISO=vm-foo.iso
+ LASTPWD=/root
+ test -f /root/iso/trisquel-netinst_10.0.1_amd64.iso
+ test -f vm-foo.preseed
+ test ! -f vm-foo.iso
+ mktemp -d
+ TMPDIR=/tmp/tmp.mNEprT4Tx9
+ mkdir /tmp/tmp.mNEprT4Tx9/mnt
+ mkdir /tmp/tmp.mNEprT4Tx9/tmp
+ cp vm-foo.preseed /tmp/tmp.mNEprT4Tx9/preseed.cfg
+ cd /tmp/tmp.mNEprT4Tx9
+ mount /root/iso/trisquel-netinst_10.0.1_amd64.iso mnt/
mount: /tmp/tmp.mNEprT4Tx9/mnt: WARNING: source write-protected, mounted read-only.
+ cp -rT mnt/ tmp/
+ umount mnt/
+ chmod +w -R tmp/
+ gunzip tmp/initrd.gz
+ echo preseed.cfg
+ cpio -H newc -o -A -F tmp/initrd
5 blocks
+ gzip tmp/initrd
+ chmod -w -R tmp/
+ sed -i s/timeout 0/timeout 1/ tmp/isolinux.cfg
+ sed -i s/default vesamenu.c32/default auto/ tmp/isolinux.cfg
+ grep -q auto tmp/adtxt.cfg
+ cat
+ cd tmp/
+ find -follow -type f
+ xargs md5sum
+ cd ..
+ cd /root
+ genisoimage -r -J -b isolinux.bin -c boot.cat -no-emul-boot -boot-load-size 4 -boot-info-table -o vm-foo.iso /tmp/tmp.mNEprT4Tx9/tmp/
I: -input-charset not specified, using utf-8 (detected in locale settings)
Using GCRY_000.MOD;1 for  /tmp/tmp.mNEprT4Tx9/tmp/boot/grub/x86_64-efi/gcry_sha512.mod (gcry_sha256.mod)
Using XNU_U000.MOD;1 for  /tmp/tmp.mNEprT4Tx9/tmp/boot/grub/x86_64-efi/xnu_uuid.mod (xnu_uuid_test.mod)
Using PASSW000.MOD;1 for  /tmp/tmp.mNEprT4Tx9/tmp/boot/grub/x86_64-efi/password_pbkdf2.mod (password.mod)
Using PART_000.MOD;1 for  /tmp/tmp.mNEprT4Tx9/tmp/boot/grub/x86_64-efi/part_sunpc.mod (part_sun.mod)
Using USBSE000.MOD;1 for  /tmp/tmp.mNEprT4Tx9/tmp/boot/grub/x86_64-efi/usbserial_pl2303.mod (usbserial_ftdi.mod)
Using USBSE001.MOD;1 for  /tmp/tmp.mNEprT4Tx9/tmp/boot/grub/x86_64-efi/usbserial_ftdi.mod (usbserial_usbdebug.mod)
Using VIDEO000.MOD;1 for  /tmp/tmp.mNEprT4Tx9/tmp/boot/grub/x86_64-efi/videotest.mod (videotest_checksum.mod)
Using GFXTE000.MOD;1 for  /tmp/tmp.mNEprT4Tx9/tmp/boot/grub/x86_64-efi/gfxterm_background.mod (gfxterm_menu.mod)
Using GCRY_001.MOD;1 for  /tmp/tmp.mNEprT4Tx9/tmp/boot/grub/x86_64-efi/gcry_sha256.mod (gcry_sha1.mod)
Using MULTI000.MOD;1 for  /tmp/tmp.mNEprT4Tx9/tmp/boot/grub/x86_64-efi/multiboot2.mod (multiboot.mod)
Using USBSE002.MOD;1 for  /tmp/tmp.mNEprT4Tx9/tmp/boot/grub/x86_64-efi/usbserial_usbdebug.mod (usbserial_common.mod)
Using MDRAI000.MOD;1 for  /tmp/tmp.mNEprT4Tx9/tmp/boot/grub/x86_64-efi/mdraid09.mod (mdraid09_be.mod)
Size of boot image is 4 sectors -> No emulation
 22.89% done, estimate finish Thu Dec 29 23:36:18 2022
 45.70% done, estimate finish Thu Dec 29 23:36:18 2022
 68.56% done, estimate finish Thu Dec 29 23:36:18 2022
 91.45% done, estimate finish Thu Dec 29 23:36:18 2022
Total translation table size: 2048
Total rockridge attributes bytes: 24816
Total directory bytes: 40960
Path table size(bytes): 64
Max brk space used 46000
21885 extents written (42 MB)
+ rm -rf /tmp/tmp.mNEprT4Tx9
+ exit 0
root@trana:~#

Now the image is ready for installation, so invoke virt-install as follows. For older virt-install (for example on Trisquel 10 nabia), replace --osinfo linux2020 with --os-variant linux2020.The machine will start directly, launching the preseed automatic installation. At this point, I usually click on the virtual machine in virt-manager to follow screen output until the installation has finished. If everything works OK the machines comes up and I can ssh into it.


root@trana:~# virt-install --name $HOST --disk vm-$HOST.img,size=5 --cdrom vm-$HOST.iso --osinfo linux2020 --autostart --noautoconsole --wait
Using linux2020 default --memory 4096

Starting install...
Allocating 'vm-foo.img'                                                                                                                                |    0 B  00:00:00 ... 
Creating domain...                                                                                                                                     |    0 B  00:00:00     

Domain is still running. Installation may be in progress.
Waiting for the installation to complete.
Domain has shutdown. Continuing.
Domain creation completed.
Restarting guest.
root@trana:~# 

There are some problems that I have noticed that would be nice to fix, but are easy to work around. The first is that at the end of the installation of Trisquel 9 and Trisquel 10, the VM hangs after displaying Sent SIGKILL to all processes followed by Requesting system reboot. I kill the VM manually using virsh destroy foo and start it up again using virsh start foo. For production use I expect to be running Trisquel 11, where the problem doesn’t happen, so this does not bother me enough to debug further.

Update 2023-03-21: The following issue was fixed between the final release of aramo and the pre-release of aramo that this blog post was originally written for, so the following no longer applies: The remaining issue that once booted, a Trisquel 11 VM has lost its DNS nameserver configuration, presumably due to poor integration with systemd-resolved. Both Trisquel 9 and Trisquel 10 uses systemd-resolved where DNS works after first boot, so this appears to be a Trisquel 11 bug. You can work around it with rm -f /etc/resolv.conf && echo 'nameserver A.B.C.D' > /etc/resolv.conf or drink the systemd Kool-Aid.

If you want to clean up and re-start the process, here is how you wipe out what you did. After this, you may run the sed, ./gen-preseed-iso and virt-install commands again. Remember, use virsh shutdown foo to gracefully shutdown a VM.


root@trana:~# virsh destroy foo
Domain 'foo' destroyed

root@trana:~# virsh undefine foo --remove-all-storage
Domain 'foo' has been undefined
Volume 'vda'(/root/vm-foo.img) removed.

root@trana:~# rm vm-foo.*
root@trana:~# 

Happy hacking on your virtal machines!

Trisquel 11 on NV41PZ: First impressions

My NovaCustom NV41PZ laptop arrived a couple of days ago, and today I had some time to install it. You may want to read about my purchasing decision process first. I expected a rough ride to get it to work, given the number of people claiming that modern laptops can’t run fully free operating systems. I first tried the Trisquel 10 live DVD and it booted fine including network, but the mouse trackpad did not work. Before investigating it, I noticed a forum thread about Trisquel 11 beta3 images, and being based on Ubuntu 22.04 LTS and has Linux-libre 5.15 it seemed better to start with more modern software. After installing through the live DVD successfully, I realized I didn’t like MATE but wanted to keep using GNOME. I reverted back to installing a minimal environment through the netinst image, and manually installed GNOME (apt-get install gnome) since I prefer that over MATE, together with a bunch of other packages. I’ve been running it for a couple of hours now, and here is a brief summary of the hardware components that works.

CPUAlder Lake Intel i7-1260P
Memory2x32GB Kingston DDR4 SODIMM 3200MHz
StorageSamsung 980 Pro 2TB NVME
BIOSDasharo Coreboot
GraphicsIntel Xe
Screen (internal)14″ 1920×1080
Screen (HDMI)Connected to Dell 27″ 2560×1440
Screen (USB-C)Connected to Dell 27″ 2560×1440 via Wavlink port extender
WebcamBuiltin 1MP Camera
MicrophoneIntel Alder Lake
KeyboardISO layout, all function keys working
MouseTrackpad, tap clicking and gestures
Ethernet RJ45Realtek RTL8111/8168/8411 with r8169 driver
Memory cardO2 Micro comes up as /dev/mmcblk0
Docking stationWavlink 4xUSB, 2xHDMI, DP, RJ45, …
ConnectivityUSB-A, USB-C
AudioIntel Alder Lake
Hardware components and status

So what’s not working? Unfortunately, NovaCustom does not offer any WiFi or Bluetooth module that is compatible with Trisquel, so the AX211 (1675x) Wifi/Bluetooth card in it is just dead weight. I imagine it would be possible to get the card to work if non-free firmware is loaded. I don’t need Bluetooth right now, and use the Technoetic N-150 USB WiFi dongle when I’m not connected to wired network.

Compared against my X201, the following factors have improved.

  • Faster – CPU benchmark suggests it is 8 times faster than my old i7-620M. While it feels snappier it is not a huge difference. While NVMe should improve SSD performance, benchmark wise the NVMe 980Pro only seems around 2-3 faster than the SATA-based 860 Evo. Going from 6GB to 64GB is 10 times more memory, which is useful for disk caching.
  • BIOS is free software.
  • EC firmware is free.
  • Operating system follows the FSDG.

I’m still unhappy about the following properties with both the NV41PZ and the X201.

  • CPU microcode is not available under free license.
  • Intel Mangement Engine is still present in the CPU.
  • No builtin WiFi/Bluetooth that works with free software.
  • Some other secondary processors (e.g., disk or screen) may be running non-free software but at least none requires non-free firmware.

Hopefully my next laptop will have improved on this further. I hope to be able to resolve the WiFi part by replacing the WiFi module, there appears to be options available but I have not tested them on this laptop yet. Does anyone know of a combined WiFi and Bluetooth M.2 module that would work on Trisquel?

While I haven’t put the laptop to heavy testing yet, everything that I would expect a laptop to be able to do seems to work fine. Including writing this blog post!

How to complicate buying a laptop

I’m about to migrate to a new laptop, having done a brief pre-purchase review of options on Fosstodon and reaching a decision to buy the NovaCustom NV41. Given the rapid launch and decline of Mastodon instances, I thought I’d better summarize my process and conclusion on my self-hosted blog until the fediverse self-hosting situation improves.

Since 2010 my main portable computing device has been the Lenovo X201 that replaced the Dell Precision M65 that I bought in 2006. I have been incredibly happy with the X201, even to the point that in 2015 when I wanted to find a replacement, I couldn’t settle on a decision and eventually realized I couldn’t articulate what was wrong with the X201 and decided to just buy another X201 second-hand for my second office. There is still no deal-breaker with the X201, and I’m doing most of my computing on it including writing this post. However, today I can better articulate what is lacking with the X201 that I desire, and the state of the available options on the market has improved since my last attempt in 2015.

Briefly, my desired properties are:

  • Portable – weight under 1.5kg
  • Screen size 9-14″
  • ISO keyboard layout, preferably Swedish layout
  • Mouse trackpad, WiFi, USB and external screen connector
  • Decent market availability: I should be able to purchase it from Sweden and have consumer protection, warranty, and some hope of getting service parts for the device
  • Manufactured and sold by a vendor that is supportive of free software
  • Preferably RJ45 connector (for data center visits)
  • As little proprietary software as possible, inspired by FSF’s Respect Your Freedom
  • Able to run a free operating system

My workload for the machine is Emacs, Firefox, Nextcloud client, GNOME, Evolution (mail & calendar), LibreOffice Calc/Writer, compiling software and some podman/qemu for testing. I have used Debian as the main operating system for the entire life of this laptop, but have experimented with PureOS recently. My current X201 is useful enough for this, although support for 4K displays and a faster machine wouldn’t hurt.

Based on my experience in 2015 that led me to make no decision, I changed perspective. This is a judgement call and I will not be able to fulfil all criteria. I will have to decide on a balance and the final choice will include elements that I really dislike, but still it will hopefully be better than nothing. The conflict for me mainly center around these parts:

  • Non-free BIOS. This is software that runs on the main CPU and has full control of everything. I want this to run free software as much as possible. Coreboot is the main project in this area, although I prefer the more freedom-oriented Libreboot.
  • Proprietary and software-upgradeable parts of the main CPU. This includes CPU microcode that is not distributed as free software. The Intel Management Engine (AMD and other CPU vendors has similar technology) falls into this category as well, and is problematic because it is an entire non-free operating system running within the CPU, with many security and freedom problems. This aspect is explored in the Libreboot FAQ further. Even if these parts can be disabled (Intel ME) or not utilized (CPU microcode), I believe the mere presence of these components in the design of the CPU is a problem, and I would prefer a CPU without these properties.
  • Non-free software in other microprocessors in the laptop. Ultimately, I tend agree with the FSF’s “secondary processor” argument but when it is possible to chose between a secondary processor that runs free software and one that runs proprietary software, I would prefer as many secondary processors as possible to run free software. The libreboot binary blob reduction policy describes a move towards stronger requirements.
  • Non-free firmware that has to be loaded during runtime into CPU or secondary processors. Using Linux-libre solves this but can cause some hardware to be unusable.
  • WiFi, BlueTooth and physical network interface (NIC/RJ45). This is the most notable example of secondary processor problem with running non-free software and requiring non-free firmware. Sometimes these may even require non-free drivers, although in recent years this has usually been reduced into requiring non-free firmware.

A simple choice for me would be to buy one of the FSF RYF certified laptops. Right now that list only contains the 10+ year old Lenovo series, and I actually already have a X200 with libreboot that I bought earlier for comparison. The reason the X200 didn’t work out as a replacement for me was the lack of a mouse trackpad, concerns about non-free EC firmware, Intel ME uncertainty (is it really neutralized?) and non-free CPU microcode (what are the bugs that it fixes?), but primarily that for some reason that I can’t fully articulate it feels weird to use a laptop manufactured by Lenovo but modified by third parties to be useful. I believe in market forces to pressure manufacturers into Doing The Right Thing, and feel that there is no incentive for Lenovo to use libreboot in the future when this market niche is already fulfilled by re-sellers modifying Lenovo laptops. So I’d be happier buying a laptop from someone who is natively supportive of they way I’m computing. I’m sure this aspect could be discussed a lot more, and maybe I’ll come back to do that, and could even reconsider my thinking (the right-to-repair argument is compelling). I will definitely continue to monitor the list of RYF-certified laptops to see if future entries are more suitable options for me.

Eventually I decided to buy the NovaCustom NV41 laptop, and it arrived quickly and I’m in the process of setting it up. I hope to write a separate blog about it next.

On language bindings & Relaunching Guile-GnuTLS

The Guile bindings for GnuTLS has been part of GnuTLS since spring 2007 when Ludovic Courtès contributed it after some initial discussion. I have been looking into getting back to do GnuTLS coding, and during a recent GnuTLS meeting one topic was Guile bindings. It seemed like a fairly self-contained project to pick up on. It is interesting to re-read the old thread when this work was included: some of the concerns brought up there now have track record to be evaluated on. My opinion that the cost of introducing a new project per language binding today is smaller than the cost of maintaining language bindings as part of the core project. I believe the cost/benefit ratio has changed during the past 15 years: introducing a new project used to come with a significant cost but this is no longer the case, as tooling and processes for packaging have improved. I have had similar experience with Java, C# and Emacs Lisp bindings for GNU Libidn as well, where maintaining them centralized slow down the pace of updates. Andreas Metzler pointed to a similar conclusion reached by Russ Allbery.

There are many ways to separate a project into two projects; just copying the files into a new git repository would have been the simplest and was my original plan. However Ludo’ mentioned git-filter-branch in an email, and the idea of keeping all git history for some of the relevant files seemed worth pursuing to me. I quickly found git-filter-repo which appears to be the recommend approach, and experimenting with it I found a way to filter out the GnuTLS repo into a small git repository that Guile-GnuTLS could be based on. The commands I used were the following, if you want to reproduce things.

$ git clone https://gitlab.com/gnutls/gnutls.git guile-gnutls
$ cd guile-gnutls/
$ git checkout f5dcbdb46df52458e3756193c2a23bf558a3ecfd
$ git-filter-repo --path guile/ --path m4/guile.m4 --path doc/gnutls-guile.texi --path doc/extract-guile-c-doc.scm --path doc/cha-copying.texi --path doc/fdl-1.3.texi

I debated with myself back and forth whether to include some files that would be named the same in the new repository but would share little to no similar lines, for example configure.ac, Makefile.am not to mention README and NEWS. Initially I thought it would be nice to preserve the history for all lines that went into the new project, but this is a subjective judgement call. What brought me over to a more minimal approach was that the contributor history and attribution would be quite strange for the new repository: Should Guile-GnuTLS attribute the work of the thousands of commits to configure.ac which had nothing to do with Guile? Should the people who wrote that be mentioned as contributor of Guile-GnuTLS? I think not.

The next step was to get a reasonable GitLab CI/CD pipeline up, to make sure the project builds on some free GNU/Linux distributions like Trisquel and PureOS as well as the usual non-free distributions like Debian and Fedora to have coverage of dpkg and rpm based distributions. I included builds on Alpine and ArchLinux as well, because they tend to trigger other portability issues. I wish there were GNU Guix docker images available for easy testing on that platform as well. The GitLab CI/CD rules for a project like this are fairly simple.

To get things out of the door, I tagged the result as v3.7.9 and published a GitLab release page for Guile-GnuTLS that includes OpenPGP-signed source tarballs manually uploaded built on my laptop. The URLs for these tarballs are not very pleasant to work with, and discovering new releases automatically appears unreliable, but I don’t know of a better approach.

To finish this project, I have proposed a GnuTLS merge request to remove all Guile-related parts from the GnuTLS core.

Doing some GnuTLS-related work again felt nice, it was quite some time ago so thank you for giving me this opportunity. Thoughts or comments? Happy hacking!

Privilege separation of GSS-API credentials for Apache

To protect web resources with Kerberos you may use Apache HTTPD with mod_auth_gssapi — however, all web scripts (e.g., PHP) run under Apache will have access to the Kerberos long-term symmetric secret credential (keytab). If someone can get it, they can impersonate your server, which is bad.

The gssproxy project makes it possible to introduce privilege separation to reduce the attack surface. There is a tutorial for RPM-based distributions (Fedora, RHEL, AlmaLinux, etc), but I wanted to get this to work on a DPKG-based distribution (Debian, Ubuntu, Trisquel, PureOS, etc) and found it worthwhile to document the process. I’m using Ubuntu 22.04 below, but have tested it on Debian 11 as well. I have adopted the gssproxy package in Debian, and testing this setup is part of the scripted autopkgtest/debci regression testing.

First install the required packages:

root@foo:~# apt-get update
root@foo:~# apt-get install -y apache2 libapache2-mod-auth-gssapi gssproxy curl

This should give you a working and running web server. Verify it is operational under the proper hostname, I’ll use foo.sjd.se in this writeup.

root@foo:~# curl --head http://foo.sjd.se/
HTTP/1.1 200 OK

The next step is to create a keytab containing the Kerberos V5 secrets for your host, the exact steps depends on your environment (usually kadmin ktadd or ipa-getkeytab), but use the string “HTTP/foo.sjd.se” and then confirm using something like the following.

root@foo:~# ls -la /etc/gssproxy/httpd.keytab
-rw------- 1 root root 176 Sep 18 06:44 /etc/gssproxy/httpd.keytab
root@foo:~# klist -k /etc/gssproxy/httpd.keytab -e
Keytab name: FILE:/etc/gssproxy/httpd.keytab
KVNO Principal
---- --------------------------------------------------------------------------
   2 HTTP/foo.sjd.se@GSSPROXY.EXAMPLE.ORG (aes256-cts-hmac-sha1-96) 
   2 HTTP/foo.sjd.se@GSSPROXY.EXAMPLE.ORG (aes128-cts-hmac-sha1-96) 
root@foo:~# 

The file should be owned by root and not be in the default /etc/krb5.keytab location, so Apache’s libapache2-mod-auth-gssapi will have to use gssproxy to use it.

Then configure gssproxy to find the credential and use it with Apache.

root@foo:~# cat<<EOF > /etc/gssproxy/80-httpd.conf
[service/HTTP]
mechs = krb5
cred_store = keytab:/etc/gssproxy/httpd.keytab
cred_store = ccache:/var/lib/gssproxy/clients/krb5cc_%U
euid = www-data
process = /usr/sbin/apache2
EOF

For debugging, it may be useful to enable more gssproxy logging:

root@foo:~# cat<<EOF > /etc/gssproxy/gssproxy.conf
[gssproxy]
debug_level = 1
EOF
root@foo:~#

Restart gssproxy so it finds the new configuration, and monitor syslog as follows:

root@foo:~# tail -F /var/log/syslog &
root@foo:~# systemctl restart gssproxy

You should see something like this in the log file:

Sep 18 07:03:15 foo gssproxy[4076]: [2022/09/18 05:03:15]: Exiting after receiving a signal
Sep 18 07:03:15 foo systemd[1]: Stopping GSSAPI Proxy Daemon…
Sep 18 07:03:15 foo systemd[1]: gssproxy.service: Deactivated successfully.
Sep 18 07:03:15 foo systemd[1]: Stopped GSSAPI Proxy Daemon.
Sep 18 07:03:15 foo gssproxy[4092]: [2022/09/18 05:03:15]: Debug Enabled (level: 1)
Sep 18 07:03:15 foo systemd[1]: Starting GSSAPI Proxy Daemon…
Sep 18 07:03:15 foo gssproxy[4093]: [2022/09/18 05:03:15]: Kernel doesn't support GSS-Proxy (can't open /proc/net/rpc/use-gss-proxy: 2 (No such file or directory))
Sep 18 07:03:15 foo gssproxy[4093]: [2022/09/18 05:03:15]: Problem with kernel communication! NFS server will not work
Sep 18 07:03:15 foo systemd[1]: Started GSSAPI Proxy Daemon.
Sep 18 07:03:15 foo gssproxy[4093]: [2022/09/18 05:03:15]: Initialization complete.

The NFS-related errors is due to a default gssproxy configuration file, it is harmless and if you don’t use NFS with GSS-API you can silence it like this:

root@foo:~# rm /etc/gssproxy/24-nfs-server.conf
root@foo:~# systemctl try-reload-or-restart gssproxy

The log should now indicate that it loaded the keytab:

Sep 18 07:18:59 foo systemd[1]: Reloading GSSAPI Proxy Daemon…
Sep 18 07:18:59 foo gssproxy[4182]: [2022/09/18 05:18:59]: Received SIGHUP; re-reading config.
Sep 18 07:18:59 foo gssproxy[4182]: [2022/09/18 05:18:59]: Service: HTTP, Keytab: /etc/gssproxy/httpd.keytab, Enctype: 18
Sep 18 07:18:59 foo gssproxy[4182]: [2022/09/18 05:18:59]: New config loaded successfully.
Sep 18 07:18:59 foo systemd[1]: Reloaded GSSAPI Proxy Daemon.

To instruct Apache — or actually, the MIT Kerberos V5 GSS-API library used by mod_auth_gssap loaded by Apache — to use gssproxy instead of using /etc/krb5.keytab as usual, Apache needs to be started in an environment that has GSS_USE_PROXY=1 set. The background is covered by the gssproxy-mech(8) man page and explained by the gssproxy README.

When systemd is used the following can be used to set the environment variable, note the final command to reload systemd.

root@foo:~# mkdir -p /etc/systemd/system/apache2.service.d
root@foo:~# cat<<EOF > /etc/systemd/system/apache2.service.d/gssproxy.conf
[Service]
Environment=GSS_USE_PROXY=1
EOF
root@foo:~# systemctl daemon-reload

The next step is to configure a GSS-API protected Apache resource:

root@foo:~# cat<<EOF > /etc/apache2/conf-available/private.conf
<Location /private>
  AuthType GSSAPI
  AuthName "GSSAPI Login"
  Require valid-user
</Location>

Enable the configuration and restart Apache — the suggested use of reload is not sufficient, because then it won’t be restarted with the newly introduced GSS_USE_PROXY variable. This just applies to the first time, after the first restart you may use reload again.

root@foo:~# a2enconf private
Enabling conf private.
To activate the new configuration, you need to run:
systemctl reload apache2
root@foo:~# systemctl restart apache2

When you have debug messages enabled, the log may look like this:

Sep 18 07:32:23 foo systemd[1]: Stopping The Apache HTTP Server…
Sep 18 07:32:23 foo gssproxy[4182]: [2022/09/18 05:32:23]: Client [2022/09/18 05:32:23]: (/usr/sbin/apache2) [2022/09/18 05:32:23]: connected (fd = 10)[2022/09/18 05:32:23]: (pid = 4651) (uid = 0) (gid = 0)[2022/09/18 05:32:23]:
Sep 18 07:32:23 foo gssproxy[4182]: message repeated 4 times: [ [2022/09/18 05:32:23]: Client [2022/09/18 05:32:23]: (/usr/sbin/apache2) [2022/09/18 05:32:23]: connected (fd = 10)[2022/09/18 05:32:23]: (pid = 4651) (uid = 0) (gid = 0)[2022/09/18 05:32:23]:]
Sep 18 07:32:23 foo systemd[1]: apache2.service: Deactivated successfully.
Sep 18 07:32:23 foo systemd[1]: Stopped The Apache HTTP Server.
Sep 18 07:32:23 foo systemd[1]: Starting The Apache HTTP Server…
Sep 18 07:32:23 foo gssproxy[4182]: [2022/09/18 05:32:23]: Client [2022/09/18 05:32:23]: (/usr/sbin/apache2) [2022/09/18 05:32:23]: connected (fd = 10)[2022/09/18 05:32:23]: (pid = 4657) (uid = 0) (gid = 0)[2022/09/18 05:32:23]:
root@foo:~# Sep 18 07:32:23 foo gssproxy[4182]: message repeated 8 times: [ [2022/09/18 05:32:23]: Client [2022/09/18 05:32:23]: (/usr/sbin/apache2) [2022/09/18 05:32:23]: connected (fd = 10)[2022/09/18 05:32:23]: (pid = 4657) (uid = 0) (gid = 0)[2022/09/18 05:32:23]:]
Sep 18 07:32:23 foo systemd[1]: Started The Apache HTTP Server.

Finally, set up a dummy test page on the server:

root@foo:~# echo OK > /var/www/html/private

To verify that the server is working properly you may acquire tickets locally and then use curl to retrieve the GSS-API protected resource. The "--negotiate" enables SPNEGO and "--user :" asks curl to use username from the environment.

root@foo:~# klist
Ticket cache: FILE:/tmp/krb5cc_0
Default principal: jas@GSSPROXY.EXAMPLE.ORG

Valid starting Expires Service principal
09/18/22 07:40:37 09/19/22 07:40:37 krbtgt/GSSPROXY.EXAMPLE.ORG@GSSPROXY.EXAMPLE.ORG
root@foo:~# curl --negotiate --user : http://foo.sjd.se/private
OK
root@foo:~#

The log should contain something like this:

Sep 18 07:56:00 foo gssproxy[4872]: [2022/09/18 05:56:00]: Client [2022/09/18 05:56:00]: (/usr/sbin/apache2) [2022/09/18 05:56:00]: connected (fd = 10)[2022/09/18 05:56:00]: (pid = 5042) (uid = 33) (gid = 33)[2022/09/18 05:56:00]:
Sep 18 07:56:00 foo gssproxy[4872]: [CID 10][2022/09/18 05:56:00]: gp_rpc_execute: executing 6 (GSSX_ACQUIRE_CRED) for service "HTTP", euid: 33,socket: (null)
Sep 18 07:56:00 foo gssproxy[4872]: [CID 10][2022/09/18 05:56:00]: gp_rpc_execute: executing 1 (GSSX_INDICATE_MECHS) for service "HTTP", euid: 33,socket: (null)
Sep 18 07:56:00 foo gssproxy[4872]: [CID 10][2022/09/18 05:56:00]: gp_rpc_execute: executing 6 (GSSX_ACQUIRE_CRED) for service "HTTP", euid: 33,socket: (null)
Sep 18 07:56:00 foo gssproxy[4872]: [CID 10][2022/09/18 05:56:00]: gp_rpc_execute: executing 9 (GSSX_ACCEPT_SEC_CONTEXT) for service "HTTP", euid: 33,socket: (null)

The Apache log will look like this, notice the authenticated username shown.

127.0.0.1 - jas@GSSPROXY.EXAMPLE.ORG [18/Sep/2022:07:56:00 +0200] "GET /private HTTP/1.1" 200 481 "-" "curl/7.81.0"

Congratulations, and happy hacking!

Static network config with Debian Cloud images

I self-host some services on virtual machines (VMs), and I’m currently using Debian 11.x as the host machine relying on the libvirt infrastructure to manage QEMU/KVM machines. While everything has worked fine for years (including on Debian 10.x), there has always been one issue causing a one-minute delay every time I install a new VM: the default images run a DHCP client that never succeeds in my environment. I never found out a way to disable DHCP in the image, and none of the documented ways through cloud-init that I have tried worked. A couple of days ago, after reading the AlmaLinux wiki I found a solution that works with Debian.

The following commands creates a Debian VM with static network configuration without the annoying one-minute DHCP delay. The three essential cloud-init keywords are the NoCloud meta-data parameters dsmode:local, static network-interfaces setting combined with the user-data bootcmd keyword. I’m using a Raptor CS Talos II ppc64el machine, so replace the image link with a genericcloud amd64 image if you are using x86.

wget https://cloud.debian.org/images/cloud/bullseye/latest/debian-11-generic-ppc64el.qcow2
cp debian-11-generic-ppc64el.qcow2 foo.qcow2

cat>meta-data
dsmode: local
network-interfaces: |
 iface enp0s1 inet static
 address 192.168.98.14/24
 gateway 192.168.98.12
^D

cat>user-data
#cloud-config
fqdn: foo.mydomain
manage_etc_hosts: true
disable_root: false
ssh_pwauth: false
ssh_authorized_keys:
- ssh-ed25519 AAAA...
timezone: Europe/Stockholm
bootcmd:
- rm -f /run/network/interfaces.d/enp0s1
- ifup enp0s1
^D

virt-install --name foo --import --os-variant debian10 --disk foo.qcow2 --cloud-init meta-data=meta-data,user-data=user-data

Unfortunately virt-install from Debian 11 does not support the –cloud-init network-config parameter, so if you want to use a version 2 network configuration with cloud-init (to specify IPv6 addresses, for example) you need to replace the final virt-install command with the following.

cat>network_config_static.cfg
version: 2
 ethernets:
  enp0s1:
   dhcp4: false
   addresses: [ 192.168.98.14/24, fc00::14/7 ]
   gateway4: 192.168.98.12
   gateway6: fc00::12
   nameservers:
    addresses: [ 192.168.98.12, fc00::12 ]
^D

cloud-localds -v -m local --network-config=network_config_static.cfg seed.iso user-data

virt-install --name foo --import --os-variant debian10 --disk foo.qcow2 --disk seed.iso,readonly=on --noreboot

virsh start foo
virsh detach-disk foo vdb --config
virsh console foo

There are still some warnings like the following, but it does not seem to cause any problem:

[FAILED] Failed to start Initial cloud-init job (pre-networking).

Finally, if you do not want the cloud-init tools installed in your VMs, I found the following set of additional user-data commands helpful. Cloud-init will not be enabled on first boot and a cron job will be added that purges some unwanted packages.

runcmd:
- touch /etc/cloud/cloud-init.disabled
- apt-get update && apt-get dist-upgrade -uy && apt-get autoremove --yes --purge && printf '#!/bin/sh\n{ rm /etc/cloud/cloud-init.disabled /etc/cloud/cloud.cfg.d/01_debian_cloud.cfg && apt-get purge --yes cloud-init cloud-guest-utils cloud-initramfs-growroot genisoimage isc-dhcp-client && apt-get autoremove --yes --purge && rm -f /etc/cron.hourly/cloud-cleanup && shutdown --reboot +1; } 2>&1 | logger -t cloud-cleanup\n' > /etc/cron.hourly/cloud-cleanup && chmod +x /etc/cron.hourly/cloud-cleanup && reboot &

The production script I’m using is a bit more complicated, but can be downloaded as vello-vm. Happy hacking!

Towards pluggable GSS-API modules

GSS-API is a standardized framework that is used by applications to, primarily, support Kerberos V5 authentication. GSS-API is standardized by IETF and supported by protocols like SSH, SMTP, IMAP and HTTP, and implemented by software projects such as OpenSSH, Exim, Dovecot and Apache httpd (via mod_auth_gssapi). The implementations of Kerberos V5 and GSS-API that are packaged for common GNU/Linux distributions, such as Debian, include MIT Kerberos, Heimdal and (less popular) GNU Shishi/GSS.

When an application or library is packaged for a GNU/Linux distribution, a choice is made which GSS-API library to link with. I believe this leads to two problematic consequences: 1) it is difficult for end-users to chose between Kerberos implementation, and 2) dependency bloat for non-Kerberos users. Let’s discuss these separately.

  1. No system admin or end-user choice over the GSS-API/Kerberos implementation used

    There are differences in the bug/feature set of MIT Kerberos and that of Heimdal’s, and definitely that of GNU Shishi. This can lead to a situation where an application (say, Curl) is linked to MIT Kerberos, and someone discovers a Kerberos related problem that would have been working if Heimdal was used, or vice versa. Sometimes it is possible to locally rebuild a package using another set of dependencies. However doing so has a high maintenance cost to track security fixes in future releases. It is an unsatisfying solution for the distribution to flip flop between which library to link to, depending on which users complain the most. To resolve this, a package could be built in two variants: one for MIT Kerberos and one for Heimdal. Both can be shipped. This can help solve the problem, but the question of which variant to install by default leads to similar concerns, and will also eventually leads to dependency conflicts. Consider an application linked to libraries (possible in several steps) where one library only supports MIT Kerberos and one library only supports Heimdal.

    The fact remains that there will continue to be multiple Kerberos implementations. Distributions will continue to support them, and will be faced with the dilemma of which one to link to by default. Distributions and the people who package software will have little guidance on which implementation to chose from their upstream, since most upstream support both implementations. The result is that system administrators and end-users are not given a simple way to have flexibility about which implementation to use.
  2. Dependency bloat for non-Kerberos use-cases.

    Compared to the number of users of GNU/Linux systems out there, the number of Kerberos users on GNU/Linux systems is smaller. Here distributions face another dilemma. Should they enable GSS-API for all applications, to satisfy the Kerberos community, or should they be conservative with adding dependencies to reduce attacker surface for the non-Kerberos users? This is a dilemma with no clear answer, and one approach has been to ship two versions of a package: one with Kerberos support and one without. Another option here is for upstream to support loadable modules, for example Dovecot implement this and Debian ship with a separate ‘dovecot-gssapi’ package that extend the core Dovecot seamlessly. Few except some larger projects appear to be willing to carry that maintenance cost upstream, so most only support build-time linking of the GSS-API library.

    There are a number of real-world situations to consider, but perhaps the easiest one to understand for most GNU/Linux users is OpenSSH. The SSH protocol supports Kerberos via GSS-API, and OpenSSH implement this feature, and most GNU/Linux distributions ship a SSH client and SSH server linked to a GSS-API library. Someone made the choice of linking it to a GSS-API library, for the arguable smaller set of people interested in it, and also the choice which library to link to. Rebuilding OpenSSH locally without Kerberos support comes with a high maintenance cost. Many people will not need or use the Kerberos features of the SSH client or SSH server, and having it enabled by default comes with a security cost. Having a vulnerability in OpenSSH is critical for many systems, and therefor its dependencies are a reasonable concern. Wouldn’t it be nice if OpenSSH was built in a way that didn’t force you to install MIT Kerberos or Heimdal? While still making it easy for Kerberos users to use it, of course.

Hopefully I have made the problem statement clear above, and that I managed to convince you that the state of affairs is in need of improving. I learned of the problems from my personal experience with maintaining GNU SASL in Debian, and for many years I ignored this problem.

Let me introduce Libgssglue!

Matryoshka Dolls
Matryoshka Dolls – photo CC-4.0-BY-NC by PngAll

Libgssglue is a library written by Kevin W. Coffman based on historical GSS-API code, the initial release was in 2004 (using the name libgssapi) and the last release was in 2012. Libgssglue provides a minimal GSS-API library and header file, so that any application can link to it instead of directly to MIT Kerberos or Heimdal (or GNU GSS). The administrator or end-user can select during run-time which GSS-API library to use, through a global /etc/gssapi_mech.conf file or even a local GSSAPI_MECH_CONF environment variable. Libgssglue is written in C, has no external dependencies, and is BSD-style licensed. It was developed for the CITI NFSv4 project but libgssglue ended up not being used.

I have added support to build GNU SASL with libgssglue — the changes required were only ./configure.ac-related since GSS-API is a standardized framework. I have written a fairly involved CI/CD check that builds GNU SASL with MIT Kerberos, Heimdal, libgssglue and GNU GSS, sets ups a local Kerberos KDC and verify successful GSS-API and GS2-KRB5 authentications. The ‘gsasl’ command line tool connects to a local example SMTP server, also based on GNU SASL (linked to all variants of GSS-API libraries), and to a system-installed Dovecot IMAP server that use the MIT Kerberos GSS-API library. This is on Debian but I expect it to be easily adaptable to other GNU/Linux distributions. The check triggered some (expected) Shishi/GSS-related missing features, and triggered one problem related to authorization identities that may be a bug in GNU SASL. However, testing shows that it is possible to link GNU SASL with libgssglue and have it be operational with any choice of GSS-API library that is shipped with Debian. See GitLab CI/CD code and its CI/CD output.

This experiment worked so well that I contacted Kevin to learn that he didn’t have any future plans for the project. I have adopted libgssglue and put up a Libgssglue GitLab project page, and pushed out a libgssglue 0.5 release fixing only some minor build-related issues. There are still some missing newly introduced GSS-API interfaces that could be added, but I haven’t been able to find any critical issues with it. Amazing that an untouched 10 year old project works so well!

My current next steps are:

  • Release GNU SASL with support for Libgssglue and encourage its use in documentation.
  • Make GNU SASL link to Libgssglue in Debian, to avoid a hard dependency on MIT Kerberos, but still allowing a default out-of-the-box Kerberos experience with GNU SASL.
  • Maintain libgssglue upstream and implement self-checks, CI/CD testing, new GSS-API interfaces that have been defined, and generally fix bugs and improve the project. Help appreciated!
  • Maintain the libgssglue package in Debian.
  • Look into if there are applications in Debian that link to a GSS-API library that could instead be linked to libgssglue to allow flexibility for the end-user and reduce dependency bloat.

What do you think? Happy Hacking!
OpenPGP smartcard with GNOME on Debian 11 Bullseye

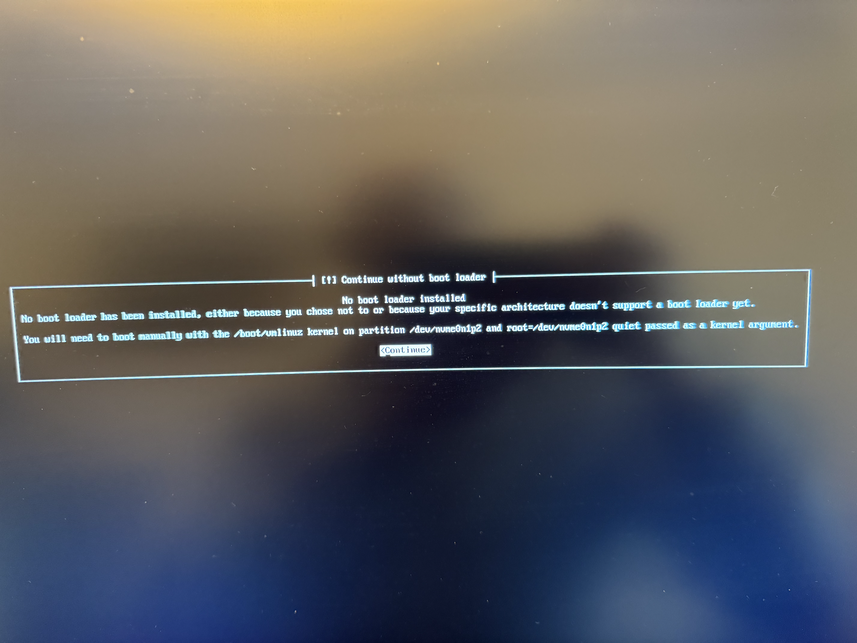
The Debian operating system is what I have been using on my main computer for what is probably around 20 years. I am now in the process of installing the hopefully soon released Debian 11 “bullseye” on my Lenovo X201 laptop. Getting a OpenPGP smartcard to work has almost always required some additional effort, but it has been reliable enough to use exclusively for my daily GnuPG and SSH operations since 2006. In the early days, the issues with smartcards were not related to GNOME, see my smartcard notes for Debian 4 Etch for example. I believe with Debian 5 Lenny, Debian 6 Squeeze, and Debian 7 Stretch things just worked without workarounds, even with GNOME. Those were the golden days! Back in 2015, with Debian 8 Jessie I noticed a regression and came up with a workaround. The problems in GNOME were not fixed, and I wrote about how to work around this for Debian 9 Stretch and the slightly different workaround needed for Debian 10 Buster. What will Bullseye be like?

The first impression of working with GnuPG and a smartcard is still the same. After inserting the GNUK that holds my private keys into my laptop, nothing happens by default and attempting to access the smartcard results in the following.

jas@latte:~$ gpg --card-status
gpg: error getting version from 'scdaemon': No SmartCard daemon
gpg: OpenPGP card not available: No SmartCard daemon
jas@latte:~$ 

The solution is to install the scdaemon package. My opinion is that either something should offer to install it when the device is inserted (wasn’t there a framework for discovering hardware and installing the right packages?) or this package should always be installed for a desktop system. Anyway, the following solves the problem.

jas@latte:~$ sudo apt install scdaemon
...
jas@latte:~$ gpg --card-status
 Reader ………..: 234B:0000:FSIJ-1.2.14-67252015:0
 Application ID …: D276000124010200FFFE672520150000
...
 URL of public key : https://josefsson.org/key-20190320.txt
...

Before the private key in the smartcard can be used, the public key must be imported into GnuPG. I now believe the best way to do this (see earlier posts for alternatives) is to configure the smartcard with a public key URL and retrieve it as follows.

jas@latte:~$ gpg --card-edit
 Reader ………..: 234B:0000:FSIJ-1.2.14-67252015:0
...
 gpg/card> fetch
 gpg: requesting key from 'https://josefsson.org/key-20190320.txt'
 gpg: key D73CF638C53C06BE: public key "Simon Josefsson simon@josefsson.org" imported
 gpg: Total number processed: 1
 gpg:               imported: 1
 gpg/card> quit
jas@latte:~$ gpg -K
 /home/jas/.gnupg/pubring.kbx
 sec#  ed25519 2019-03-20 [SC] [expires: 2021-08-21]
       B1D2BD1375BECB784CF4F8C4D73CF638C53C06BE
 uid           [ unknown] Simon Josefsson simon@josefsson.org
 ssb>  ed25519 2019-03-20 [A] [expires: 2021-08-21]
 ssb>  ed25519 2019-03-20 [S] [expires: 2021-08-21]
 ssb>  cv25519 2019-03-20 [E] [expires: 2021-08-21]
jas@latte:~$ 

The next step is to mark your own key as ultimately trusted, use the fingerprint shown above together with gpg --import-ownertrust. Warning! This is not the general way to remove the warning about untrusted keys, this method should only be used for your own keys.

jas@latte:~$ echo "B1D2BD1375BECB784CF4F8C4D73CF638C53C06BE:6:" | gpg --import-ownertrust
gpg: inserting ownertrust of 6
jas@latte:~$ gpg -K
gpg: checking the trustdb
gpg: marginals needed: 3  completes needed: 1  trust model: pgp
gpg: depth: 0  valid:   1  signed:   0  trust: 0-, 0q, 0n, 0m, 0f, 1u
gpg: next trustdb check due at 2021-08-21
 /home/jas/.gnupg/pubring.kbx
sec#  ed25519 2019-03-20 [SC] [expires: 2021-08-21]
       B1D2BD1375BECB784CF4F8C4D73CF638C53C06BE
uid           [ultimate] Simon Josefsson simon@josefsson.org
ssb>  cv25519 2019-03-20 [E] [expires: 2021-08-21]
ssb>  ed25519 2019-03-20 [A] [expires: 2021-08-21]
ssb>  ed25519 2019-03-20 [S] [expires: 2021-08-21]
jas@latte:~$ 

Now GnuPG is able to both sign, encrypt, and decrypt data:

jas@latte:~$ echo foo|gpg -a --sign|gpg --verify
 gpg: Signature made Sat May  1 16:02:49 2021 CEST
 gpg:                using EDDSA key A3CC9C870B9D310ABAD4CF2F51722B08FE4745A2
 gpg: Good signature from "Simon Josefsson simon@josefsson.org" [ultimate]
 jas@latte:~$ echo foo|gpg -a --encrypt -r simon@josefsson.org|gpg --decrypt
 gpg: encrypted with 256-bit ECDH key, ID 02923D7EE76EBD60, created 2019-03-20
       "Simon Josefsson simon@josefsson.org"
 foo
jas@latte:~$ 

To make SSH work with the smartcard, the following is the GNOME-related workaround that is still required. The problem is that the GNOME keyring enables its own incomplete SSH-agent implementation. It is lacking the smartcard support that the GnuPG agent can provide, and even set the SSH_AUTH_SOCK environment variable if the enable-ssh-support parameter is provided.

jas@latte:~$ ssh-add -L
 The agent has no identities.
jas@latte:~$ echo $SSH_AUTH_SOCK 
 /run/user/1000/keyring/ssh
jas@latte:~$ mkdir -p ~/.config/autostart
jas@latte:~$ cp /etc/xdg/autostart/gnome-keyring-ssh.desktop ~/.config/autostart/
jas@latte:~$ echo 'Hidden=true' >> .config/autostart/gnome-keyring-ssh.desktop 
jas@latte:~$ echo enable-ssh-support >> ~/.gnupg/gpg-agent.conf

For some reason, it does not seem sufficient to log out of GNOME and then login again. Most likely some daemon is still running, that has to be restarted. At this point, I reboot my laptop and then log into GNOME again. Finally it looks correct:

jas@latte:~$ echo $SSH_AUTH_SOCK 
 /run/user/1000/gnupg/S.gpg-agent.ssh
jas@latte:~$ ssh-add -L
 ssh-ed25519 AAAAC3NzaC1lZDI1NTE5AAAAILzCFcHHrKzVSPDDarZPYqn89H5TPaxwcORgRg+4DagE cardno:FFFE67252015
jas@latte:~$ 

Please discuss in small groups the following topics:

  • How should the scdaemon package be installed more automatically?
  • Should there a simple command to retrieve the public key for a smartcard and set it as ultimately trusted? The two step --card-edit and --import-ownertrust steps is a bad user interface and is not intuitive in my opinion.
  • Why is GNOME keyring used for SSH keys instead of ssh-agent/gpg-agent?
  • Should gpg-agent have enable-ssh-support on by default?

After these years, I would probably feel a bit of sadness if the problems were fixed, since then I wouldn’t be able to rant about this problem and celebrate installing Debian 12 Bookworm the same way I have done for the some past releases.

Thanks for reading and happy hacking!