ISO images for non-amd64 platforms are unfortunately still hidden from the main Trisquel download area, so you will have to use the following procedure to download and extract a netinst ISO image (using debian-installer) and write it to a USB memory device. Another unfortunate problem is that there are no OpenPGP signatures or hash checksums, but below I publish one checksum.
Insert the USB stick in a USB slot in the machine, and power up. Press ESCAPE at the BIOS prompt and select the USB device as the boot device. The first problem that hit me was that translations didn’t work, I selected Swedish but the strings were garbled. Rebooting and selecting the default English worked fine. For installation, you need Internet connectivity and I use the RJ45 port closest to VGA/serial which is available as enP5p1s0 in the installer. I wouldn’t connect the BMC RJ45 port to anything unless you understand the security implications.
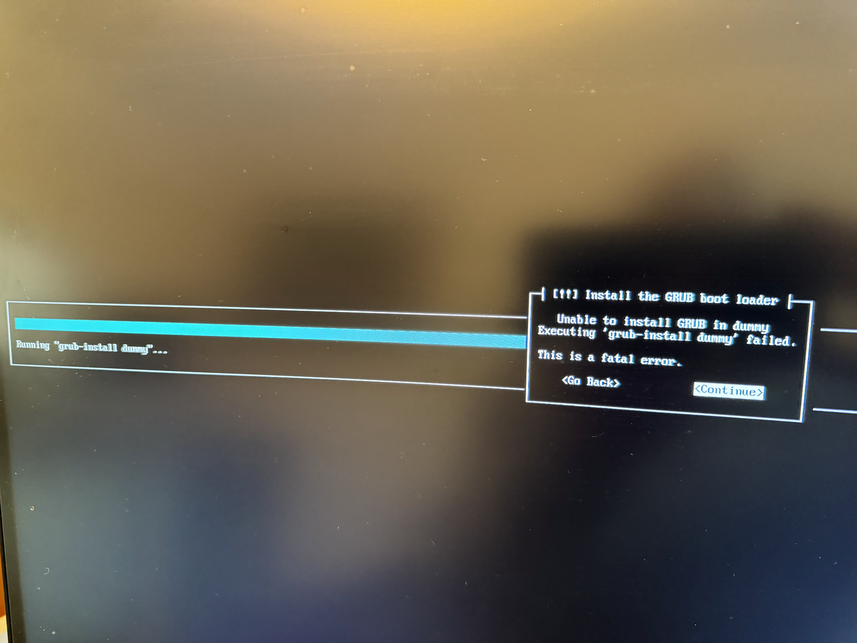
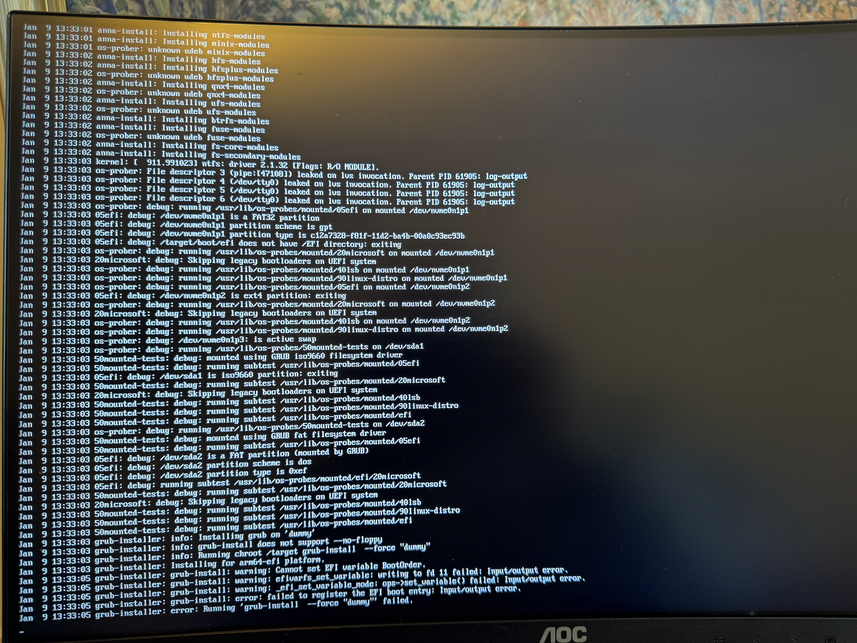
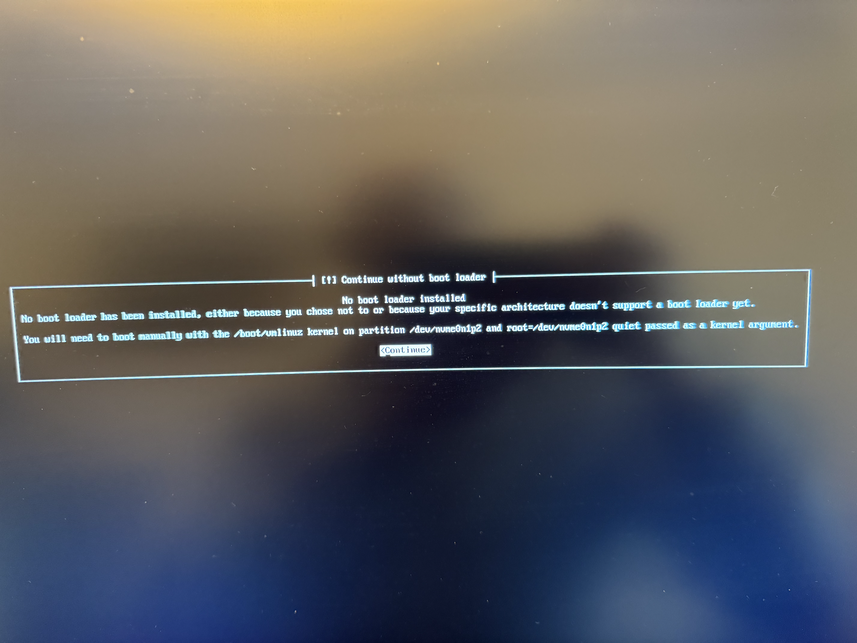
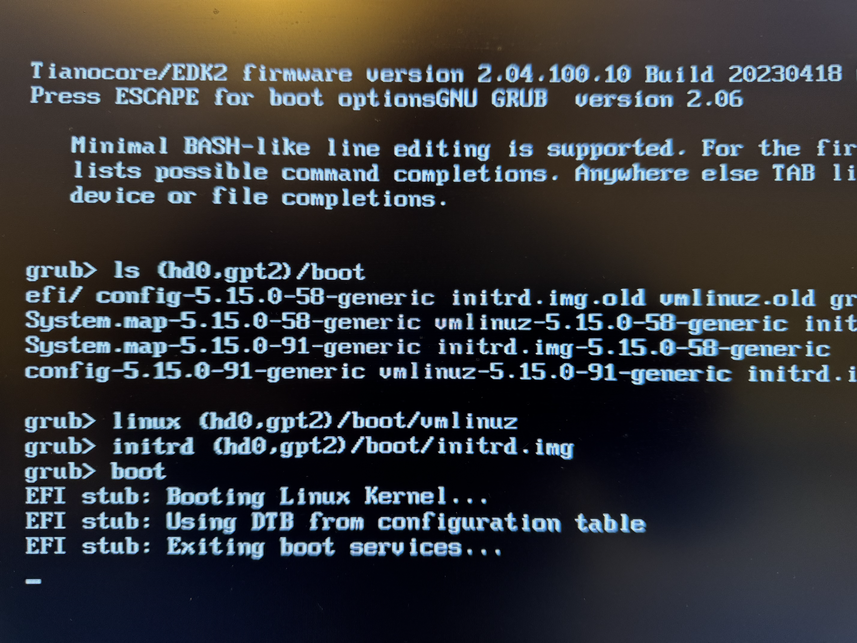
During installation you have to create a EFI partition for booting, and I ended up with one 1GB EFI partition, one 512GB ext4 partition for / with discard/noatime options, and a 32GB swap partition. The installer did not know about any Trisquel mirrors, but only had the default archive.trisquel.org, so if you need to use a mirror, take a note of the necessary details. The installation asks me about which kernel to install, and I went with the default linux-generic which results in a 5.15 linux-libre kernel. At the end of installation, unfortunately grub failed with a mysterious error message: Unable to install GRUB in dummy. Executing 'grub-install dummy' failed. On another console there is a better error message: failed to register the EFI boot entry. There are some references to file descriptor issues. Perhaps I partitioned the disk in a bad way, or this is a real bug in the installer for this platform. I continued installation, and it appears the installer was able to write GRUB to the device, but not add the right boot menu. So I was able to finish the installation properly, and then reboot and manually type the following GRUB commands: linux (hd0,gpt2)/boot/vmlinuz initrd (hd0,gpt2)/boot/initrd.img boot. Use the GRUB ls command to find the right device. See images below for more information.
Booting and installing GRUB again manually works fine:
root@ampel:~# update-grub
Sourcing file `/etc/default/grub'
Sourcing file `/etc/default/grub.d/background.cfg'
Sourcing file `/etc/default/grub.d/init-select.cfg'
Generating grub configuration file ...
Found linux image: /boot/vmlinuz-5.15.0-91-generic
Found initrd image: /boot/initrd.img-5.15.0-91-generic
Found linux image: /boot/vmlinuz-5.15.0-58-generic
Found initrd image: /boot/initrd.img-5.15.0-58-generic
Warning: os-prober will not be executed to detect other bootable partitions.
Systems on them will not be added to the GRUB boot configuration.
Check GRUB_DISABLE_OS_PROBER documentation entry.
Adding boot menu entry for UEFI Firmware Settings ...
done
root@ampel:~#
During installation I tend to avoid selecting any tasksel components, in part because it didn’t use a local mirror to gain network speed, and in part because I don’t want to generate OpenSSH keys in a possibly outdated environment that is harder to audit and reproducible rebuild than the finally installed system. When I selected the OpenSSH and GNOME tasksel, I get an error, but fortunately using apt get directly is simple.
Graphics in GNOME was slow using the built-in ASPEED AST2500 VGA controller with linux-libre 5.15. There are kernels labeled 64k but I haven’t tested them, and I’m not sure they would bring any significant advantage. I simply upgraded to a more recent linux-libre 6.2 kernel via the linux-image-generic-hwe-11.0 virtual package. After a reboot, graphics in GNOME is usable.
There seems to be some issue with power-saving inside GNOME, since the machine becomes unresponsive after 20 minutes, and I’m unable to make it resume via keyboard or power button. Disabling the inactivity power setting in GNOME works fine to resolve this.
I will now put this machine to some more heavy use and see how it handles it. I hope to find more suitable arm64-based servers to complement my ppc64el-based servers in the future, as this ADLINK Ampere Altra Developer Platform with liquid-cooling is more of a toy than a serious server for use in a datacentre.
Since the release of Trisquel 11 I have been busy migrating x86 machines from Debian to Trisquel. One would think that I would be finished after this time period, but re-installing and migrating machines is really time consuming, especially if you allow yourself to be distracted every time you notice something that Really Ought to be improved. Rabbit holes all the way down. One of my production machines is running Debian 11 “bullseye” on a Talos II Lite machine from Raptor Computing Systems, and migrating the virtual machines running on that host (including the VM that serves this blog) to a x86 machine running Trisquel felt unsatisfying to me. I want to migrate my computing towards hardware that harmonize with FSF’s Respects Your Freedom and not away from it. Here I had to chose between using the non-free software present in newer Debian or the non-free software implied by most x86 systems: not an easy chose. So I have ignored the dilemma for some time. After all, the machine was running Debian 11 “bullseye”, which was released before Debian started to require use of non-free software. With the end-of-life date for bullseye approaching, it seems that this isn’t a sustainable choice.
There is a report open about providing ppc64el ISOs that was created by Jason Self shortly after the release, but for many months nothing happened. About a month ago, Luis Guzmán mentioned an initial ISO build and I started testing it. The setup has worked well for a month, and with this post I want to contribute instructions how to get it up and running since this is still missing.
The setup of my soon-to-be new production machine:
Talos II Lite
POWER9 18-core v2 CPU
Inter-Tech 4U-4410 rack case with ASPOWER power supply
8x32GB DDR4-2666 ECC RDIMM
HighPoint SSD7505 (the Rocket 1504 or 1204 would be a more cost-effective choice, but I re-used a component I had laying around)
PERC H700 aka LSI MegaRAID 2108 SAS/SATA (also found laying around)
Sadly, no hash checksums or OpenPGP signatures are published.
Power off your device, insert the USB stick, and power it up, and you see a Petitboot menu offering to boot from the USB stick. For some reason, the "Expert Install" was the default in the menu, and instead I select "Default Install" for the regular experience. For this post, I will ignore BMC/IPMI, as interacting with it is not necessary. Make sure to not connect the BMC/IPMI ethernet port unless you are willing to enter that dungeon. The VGA console works fine with a normal USB keyboard, and you can chose to use only the second enP4p1s0f1 network card in the network card selection menu.
If you are familiar with Debian netinst ISO’s, the installation is straight-forward. I complicate the setup by partitioning two RAID1 partitions on the two NVMe sticks, one RAID1 for a 75GB ext4 root filesystem (discard,noatime) and one RAID1 for a 900GB LVM volume group for virtual machines, and two 20GB swap partitions on each of the NVMe sticks (to silence a warning about lack of swap, I’m not sure swap is still a good idea?). The 3x18TB disks use DM-integrity with RAID1 however the installer does not support DM-integrity so I had to create it after the installation.
There are two additional matters worth mentioning:
Selecting the apt mirror does not have the list of well-known Trisquel mirrors which the x86 installer offers. Instead I have to input the archive mirror manually, and fortunately the archive.trisquel.org hostname and path values are available as defaults, so I just press enter and fix this after the installation has finished. You may want to have the hostname/path of your local mirror handy, to speed things up.
The installer asks me which kernel to use, which the x86 installer does not do. I believe older Trisquel/Ubuntu installers asked this question, but that it was gone in aramo on x86. I select the default “linux-image-generic” which gives me a predictable 5.15 Linux-libre kernel, although you may want to chose “linux-image-generic-hwe-11.0” for a more recent 6.2 Linux-libre kernel. Maybe this is intentional debinst-behaviour for non-x86 platforms?
I have re-installed the machine a couple of times, and have now finished installing the production setup. I haven’t ran into any serious issues, and the system has been stable. Time to wrap up, and celebrate that I now run an operating system aligned with the Free System Distribution Guidelines on hardware that aligns with Respects Your Freedom — Happy Hacking indeed!
I use GnuPG to compute cryptographic signatures for my emails, git commits/tags, and software release artifacts (tarballs). Part of GnuPG is gpg-agent which talks to OpenSSH, which I login to remote servers and to clone git repositories. I dislike storing cryptographic keys on general-purpose machines, and have used hardware-backed OpenPGP keys since around 2006 when I got a FSFE Fellowship Card. GnuPG via gpg-agent handles this well, and the private key never leaves the hardware. The ZeitControl cards were (to my knowledge) proprietary hardware running some non-free operating system and OpenPGP implementation. By late 2012 the YubiKey NEO supported OpenPGP, and while the hardware and operating system on it was not free, at least it ran a free software OpenPGP implementation and eventually I setup my primary RSA key on it. This worked well for a couple of years, and when I in 2019 wished to migrate to a new key, the FST-01G device with open hardware running free software that supported Ed25519 had become available. I created a key and have been using the FST-01G on my main laptop since then. This little device has been working, the signature counter on it is around 14501 which means around 10 signatures/day since then!
Currently I am in the process of migrating towards a new laptop, and moving the FST-01G device between them is cumbersome, especially if I want to use both laptops in parallel. That’s why I need to setup a new hardware device to hold my OpenPGP key, which can go with my new laptop. This is a good time to re-visit alternatives. I quickly decided that I did not want to create a new key, only to import my current one to keep everything working. My requirements on the device to chose hasn’t changed since 2019, see my summary at the end of the earlier blog post. Unfortunately the FST-01G is out of stock and the newer FST-01SZ has also out of stock. While Tillitis looks promising (and I have one to play with), it does not support OpenPGP (yet). What to do? Fortunately, I found some FST-01SZ device in my drawer, and decided to use it pending a more satisfactory answer. Hopefully once I get around to generate a new OpenPGP key in a year or so, I will do a better survey of options that are available on the market then. What are your (freedom-respecting) OpenPGP hardware recommendations?
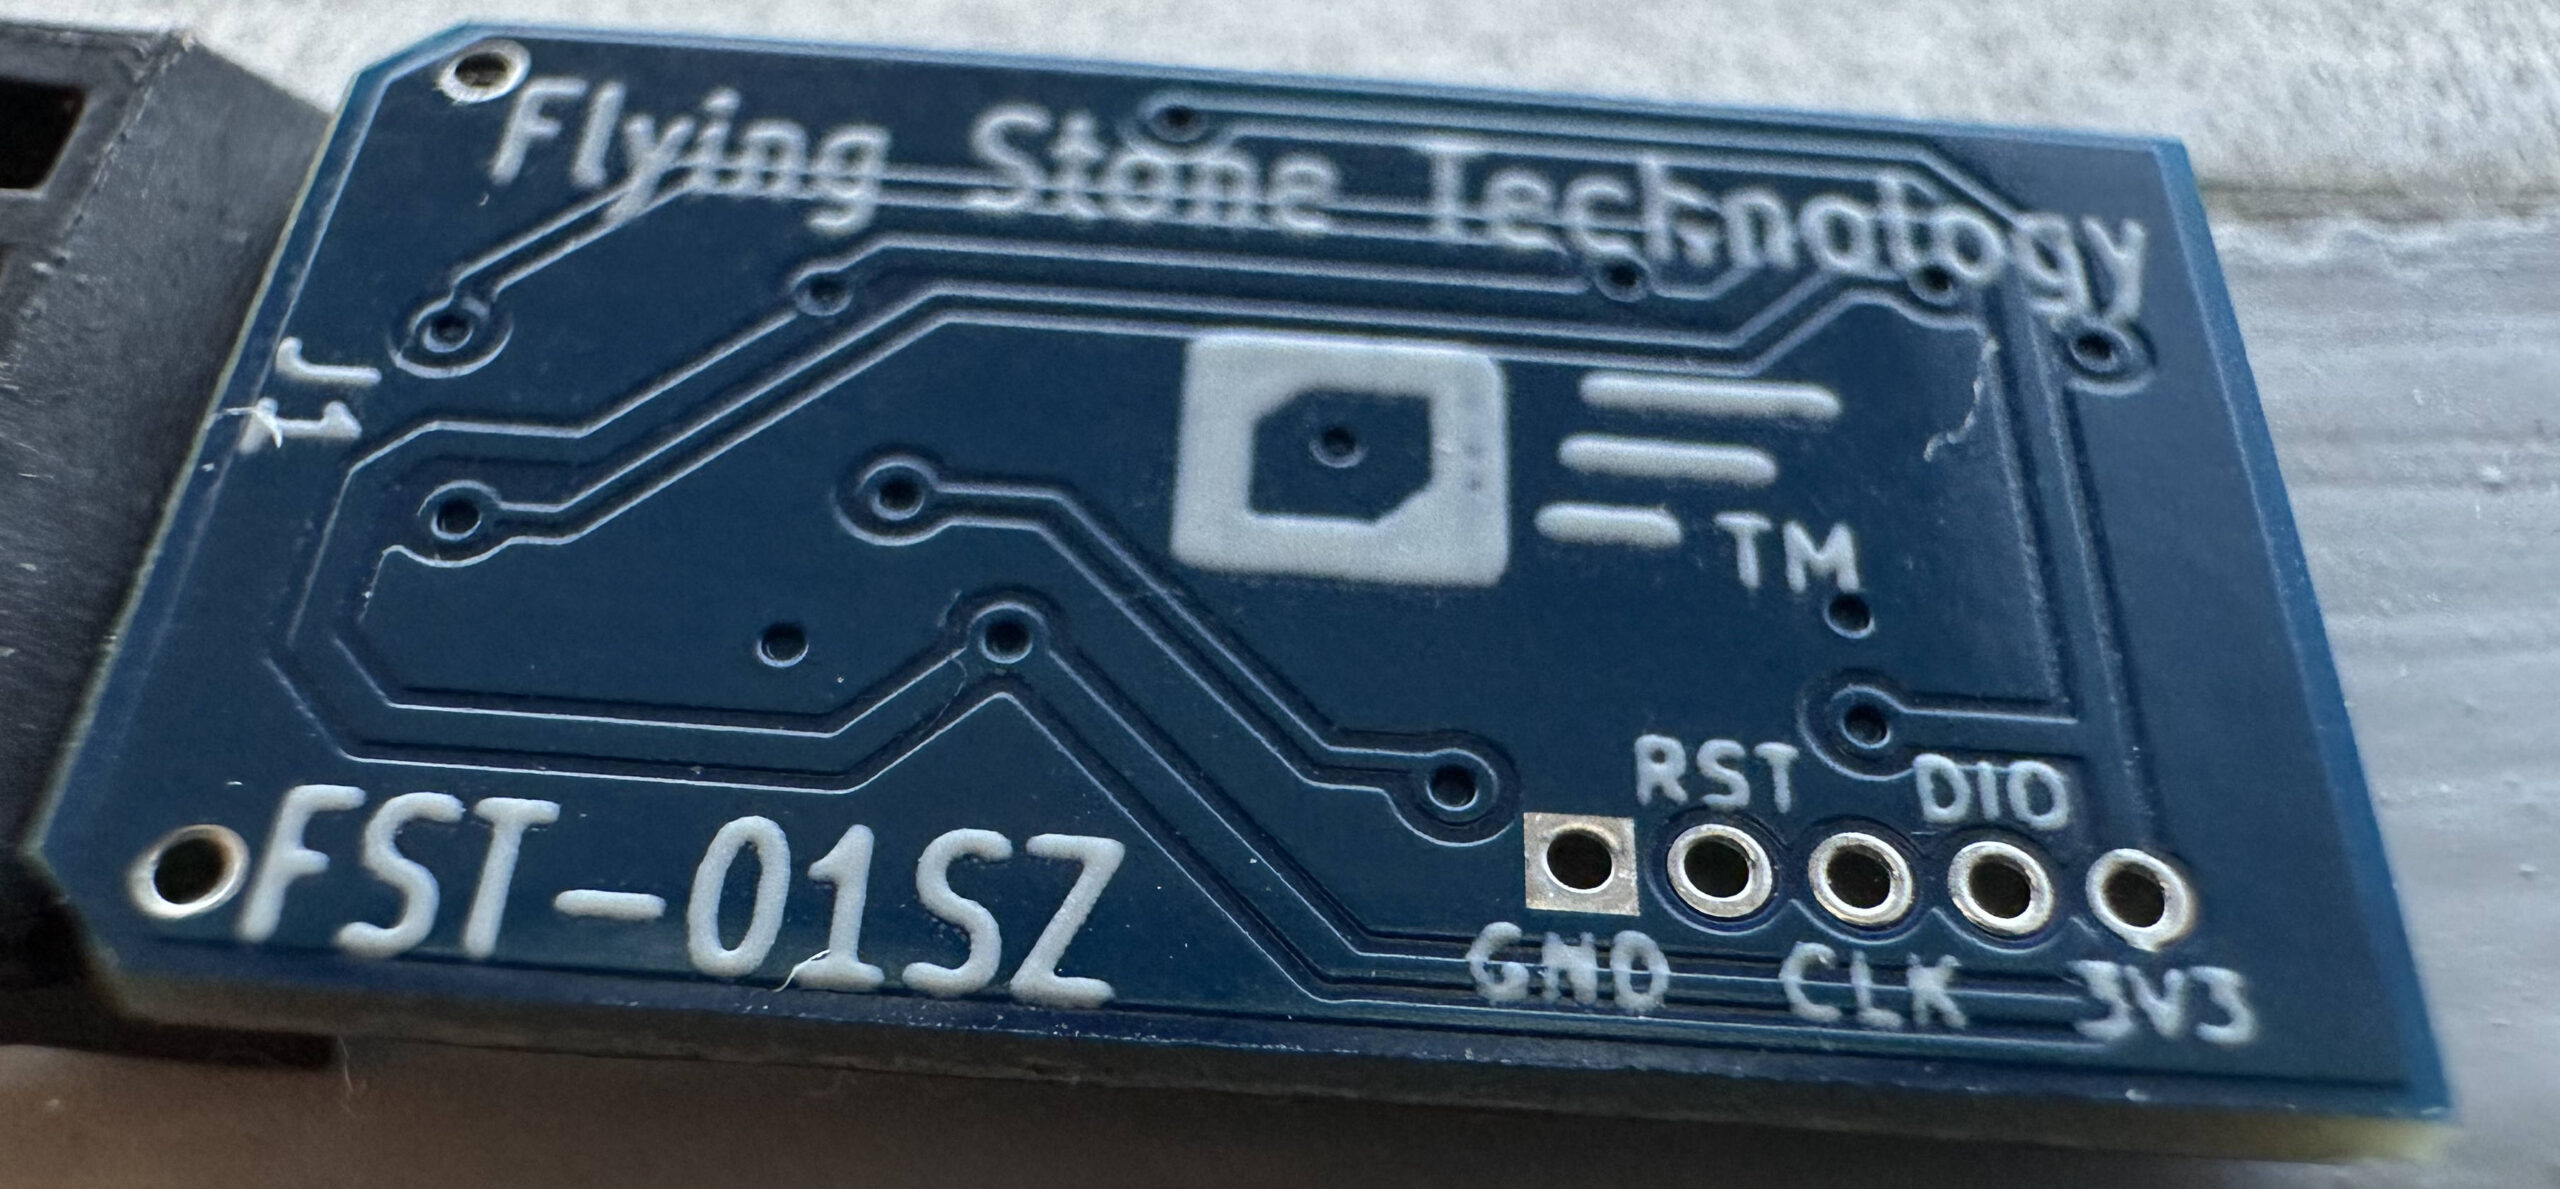
FST-01SZ circuit board
Similar to setting up the FST-01G, the FST-01SZ needs to be setup before use. I’m doing the following from Trisquel 11 but any GNU/Linux system would work. When the device is inserted at first time, some kernel messages are shown (see /var/log/syslog or use the dmesg command):
usb 3-3: new full-speed USB device number 39 using xhci_hcd
usb 3-3: New USB device found, idVendor=234b, idProduct=0004, bcdDevice= 2.00
usb 3-3: New USB device strings: Mfr=1, Product=2, SerialNumber=3
usb 3-3: Product: Fraucheky
usb 3-3: Manufacturer: Free Software Initiative of Japan
usb 3-3: SerialNumber: FSIJ-0.0
usb-storage 3-3:1.0: USB Mass Storage device detected
scsi host1: usb-storage 3-3:1.0
scsi 1:0:0:0: Direct-Access     FSIJ     Fraucheky        1.0  PQ: 0 ANSI: 0
sd 1:0:0:0: Attached scsi generic sg2 type 0
sd 1:0:0:0: [sdc] 128 512-byte logical blocks: (65.5 kB/64.0 KiB)
sd 1:0:0:0: [sdc] Write Protect is off
sd 1:0:0:0: [sdc] Mode Sense: 03 00 00 00
sd 1:0:0:0: [sdc] No Caching mode page found
sd 1:0:0:0: [sdc] Assuming drive cache: write through
 sdc:
sd 1:0:0:0: [sdc] Attached SCSI removable disk
Interestingly, the NeuG software installed on the device I got appears to be version 1.0.9:
jas@kaka:~$ head /media/jas/Fraucheky/README
NeuG - a true random number generator implementation
						  Version 1.0.9
						     2018-11-20
					           Niibe Yutaka
			      Free Software Initiative of Japan
What's NeuG?
============
jas@kaka:~$
I could not find version 1.0.9 published anywhere, but the device came with a SD-card that contain a copy of the source, so I uploaded it until a more canonical place is located. Putting the device in the serial mode can be done using a sudo eject /dev/sdc command which results in the following syslog output.
usb 3-3: reset full-speed USB device number 39 using xhci_hcd
usb 3-3: device firmware changed
usb 3-3: USB disconnect, device number 39
sdc: detected capacity change from 128 to 0
usb 3-3: new full-speed USB device number 40 using xhci_hcd
usb 3-3: New USB device found, idVendor=234b, idProduct=0001, bcdDevice= 2.00
usb 3-3: New USB device strings: Mfr=1, Product=2, SerialNumber=3
usb 3-3: Product: NeuG True RNG
usb 3-3: Manufacturer: Free Software Initiative of Japan
usb 3-3: SerialNumber: FSIJ-1.0.9-42315277
cdc_acm 3-3:1.0: ttyACM0: USB ACM device
Now download Gnuk, verify its integrity and build it. You may need some additional packages installed, try apt-get install gcc-arm-none-eabi openocd python3-usb. As you can see, I’m using the stable 1.2 branch of Gnuk, currently on version 1.2.20. The ./configure parameters deserve some explanation. The kdf_do=required sets up the device to require KDF usage. The --enable-factory-reset allows me to use the command factory-reset (with admin PIN) inside gpg --card-edit to completely wipe the card. Some may consider that too dangerous, but my view is that if someone has your admin PIN it is game over anyway. The --vidpid=234b:0000 is specifies the USB VID/PID to use, and --target=FST_01SZ is critical to set the platform (you’ll may brick the device if you pick the wrong --target setting).
jas@kaka:~/src$ rm -rf gnuk neug
jas@kaka:~/src$ git clone https://gitlab.com/jas/neug.git
Cloning into 'neug'...
remote: Enumerating objects: 2034, done.
remote: Counting objects: 100% (2034/2034), done.
remote: Compressing objects: 100% (603/603), done.
remote: Total 2034 (delta 1405), reused 2013 (delta 1405), pack-reused 0
Receiving objects: 100% (2034/2034), 910.34 KiB | 3.50 MiB/s, done.
Resolving deltas: 100% (1405/1405), done.
jas@kaka:~/src$ git clone https://salsa.debian.org/gnuk-team/gnuk/gnuk.git
Cloning into 'gnuk'...
remote: Enumerating objects: 13765, done.
remote: Counting objects: 100% (959/959), done.
remote: Compressing objects: 100% (337/337), done.
remote: Total 13765 (delta 629), reused 907 (delta 599), pack-reused 12806
Receiving objects: 100% (13765/13765), 12.59 MiB | 3.05 MiB/s, done.
Resolving deltas: 100% (10077/10077), done.
jas@kaka:~/src$ cd neug
jas@kaka:~/src/neug$ git describe
release/1.0.9
jas@kaka:~/src/neug$ git tag -v `git describe`
object 5d51022a97a5b7358d0ea62bbbc00628c6cec06a
type commit
tag release/1.0.9
tagger NIIBE Yutaka <gniibe@fsij.org> 1542701768 +0900

Version 1.0.9.
gpg: Signature made Tue Nov 20 09:16:08 2018 CET
gpg:                using EDDSA key 249CB3771750745D5CDD323CE267B052364F028D
gpg:                issuer "gniibe@fsij.org"
gpg: Good signature from "NIIBE Yutaka <gniibe@fsij.org>" [unknown]
gpg:                 aka "NIIBE Yutaka <gniibe@debian.org>" [unknown]
gpg: WARNING: This key is not certified with a trusted signature!
gpg:          There is no indication that the signature belongs to the owner.
Primary key fingerprint: 249C B377 1750 745D 5CDD  323C E267 B052 364F 028D
jas@kaka:~/src/neug$ cd ../gnuk/
jas@kaka:~/src/gnuk$ git checkout STABLE-BRANCH-1-2
Branch 'STABLE-BRANCH-1-2' set up to track remote branch 'STABLE-BRANCH-1-2' from 'origin'.
Switched to a new branch 'STABLE-BRANCH-1-2'
jas@kaka:~/src/gnuk$ git describe
release/1.2.20
jas@kaka:~/src/gnuk$ git tag -v `git describe`
object 9d3c08bd2beb73ce942b016d4328f0a596096c02
type commit
tag release/1.2.20
tagger NIIBE Yutaka <gniibe@fsij.org> 1650594032 +0900

Gnuk: Version 1.2.20
gpg: Signature made Fri Apr 22 04:20:32 2022 CEST
gpg:                using EDDSA key 249CB3771750745D5CDD323CE267B052364F028D
gpg: Good signature from "NIIBE Yutaka <gniibe@fsij.org>" [unknown]
gpg:                 aka "NIIBE Yutaka <gniibe@debian.org>" [unknown]
gpg: WARNING: This key is not certified with a trusted signature!
gpg:          There is no indication that the signature belongs to the owner.
Primary key fingerprint: 249C B377 1750 745D 5CDD  323C E267 B052 364F 028D
jas@kaka:~/src/gnuk/src$ git submodule update --init
Submodule 'chopstx' (https://salsa.debian.org/gnuk-team/chopstx/chopstx.git) registered for path '../chopstx'
Cloning into '/home/jas/src/gnuk/chopstx'...
Submodule path '../chopstx': checked out 'e12a7e0bb3f004c7bca41cfdb24c8b66daf3db89'
jas@kaka:~/src/gnuk$ cd chopstx
jas@kaka:~/src/gnuk/chopstx$ git describe
release/1.21
jas@kaka:~/src/gnuk/chopstx$ git tag -v `git describe`
object e12a7e0bb3f004c7bca41cfdb24c8b66daf3db89
type commit
tag release/1.21
tagger NIIBE Yutaka <gniibe@fsij.org> 1650593697 +0900

Chopstx: Version 1.21
gpg: Signature made Fri Apr 22 04:14:57 2022 CEST
gpg:                using EDDSA key 249CB3771750745D5CDD323CE267B052364F028D
gpg: Good signature from "NIIBE Yutaka <gniibe@fsij.org>" [unknown]
gpg:                 aka "NIIBE Yutaka <gniibe@debian.org>" [unknown]
gpg: WARNING: This key is not certified with a trusted signature!
gpg:          There is no indication that the signature belongs to the owner.
Primary key fingerprint: 249C B377 1750 745D 5CDD  323C E267 B052 364F 028D
jas@kaka:~/src/gnuk/chopstx$ cd ../src
jas@kaka:~/src/gnuk/src$ kdf_do=required ./configure --enable-factory-reset --vidpid=234b:0000 --target=FST_01SZ
Header file is: board-fst-01sz.h
Debug option disabled
Configured for bare system (no-DFU)
PIN pad option disabled
CERT.3 Data Object is NOT supported
Card insert/removal by HID device is NOT supported
Life cycle management is supported
Acknowledge button is supported
KDF DO is required before key import/generation
jas@kaka:~/src/gnuk/src$ make | less
jas@kaka:~/src/gnuk/src$ cd ../regnual/
jas@kaka:~/src/gnuk/regnual$ make | less
jas@kaka:~/src/gnuk/regnual$ cd ../../
jas@kaka:~/src$ sudo python3 neug/tool/neug_upgrade.py -f gnuk/regnual/regnual.bin gnuk/src/build/gnuk.bin
gnuk/regnual/regnual.bin: 4608
gnuk/src/build/gnuk.bin: 109568
CRC32: b93ca829

Device:
Configuration: 1
Interface: 1
20000e00:20005000
Downloading flash upgrade program...
start 20000e00
end   20002000
# 20002000: 32 : 4
Run flash upgrade program...
Wait 1 second...
Wait 1 second...
Device:
08001000:08020000
Downloading the program
start 08001000
end   0801ac00
jas@kaka:~/src$
The kernel log will contain the following, and the card is ready to use as an OpenPGP card. You may unplug it and re-insert it as you wish.
usb 3-3: reset full-speed USB device number 41 using xhci_hcd
usb 3-3: device firmware changed
usb 3-3: USB disconnect, device number 41
usb 3-3: new full-speed USB device number 42 using xhci_hcd
usb 3-3: New USB device found, idVendor=234b, idProduct=0000, bcdDevice= 2.00
usb 3-3: New USB device strings: Mfr=1, Product=2, SerialNumber=3
usb 3-3: Product: Gnuk Token
usb 3-3: Manufacturer: Free Software Initiative of Japan
usb 3-3: SerialNumber: FSIJ-1.2.20-42315277
Setting up the card is the next step, and there are many tutorials around for this, eventually I settled with the following sequence. Let’s start with setting the admin PIN. First make sure that pcscd nor scdaemon is running, which is good hygien since those processes cache some information and with a stale connection this easily leads to confusion. Cache invalidation… sigh.
jas@kaka:~$ gpg-connect-agent "SCD KILLSCD" "SCD BYE" /bye
jas@kaka:~$ ps auxww|grep -e pcsc -e scd
jas        30221  0.0  0.0   3468  1692 pts/3    R+   11:49   0:00 grep --color=auto -e pcsc -e scd
jas@kaka:~$ gpg --card-edit

Reader ...........: 234B:0000:FSIJ-1.2.20-42315277:0
Application ID ...: D276000124010200FFFE423152770000
Application type .: OpenPGP
Version ..........: 2.0
Manufacturer .....: unmanaged S/N range
Serial number ....: 42315277
Name of cardholder: [not set]
Language prefs ...: [not set]
Salutation .......:
URL of public key : [not set]
Login data .......: [not set]
Signature PIN ....: forced
Key attributes ...: rsa2048 rsa2048 rsa2048
Max. PIN lengths .: 127 127 127
PIN retry counter : 3 3 3
Signature counter : 0
KDF setting ......: off
Signature key ....: [none]
Encryption key....: [none]
Authentication key: [none]
General key info..: [none]

gpg/card> admin
Admin commands are allowed

gpg/card> kdf-setup

gpg/card> passwd
gpg: OpenPGP card no. D276000124010200FFFE423152770000 detected

1 - change PIN
2 - unblock PIN
3 - change Admin PIN
4 - set the Reset Code
Q - quit

Your selection? 3
PIN changed.

1 - change PIN
2 - unblock PIN
3 - change Admin PIN
4 - set the Reset Code
Q - quit

Your selection?
Now it would be natural to setup the PIN and reset code. However the Gnuk software is configured to not allow this until the keys are imported. You would get the following somewhat cryptical error messages if you try. This took me a while to understand, since this is device-specific, and some other OpenPGP implementations allows you to configure a PIN and reset code before key import.
Your selection? 4
Error setting the Reset Code: Card error

1 - change PIN
2 - unblock PIN
3 - change Admin PIN
4 - set the Reset Code
Q - quit

Your selection? 1
Error changing the PIN: Conditions of use not satisfied

1 - change PIN
2 - unblock PIN
3 - change Admin PIN
4 - set the Reset Code
Q - quit

Your selection? q
Continue to configure the card and make it ready for key import. Some settings deserve comments. The lang field may be used to setup the language, but I have rarely seen it use, and I set it to ‘sv‘ (Swedish) mostly to be able to experiment if any software adhears to it. The URL is important to point to somewhere where your public key is stored, the fetch command of gpg --card-edit downloads it and sets up GnuPG with it when you are on a clean new laptop. The forcesig command changes the default so that a PIN code is not required for every digital signature operation, remember that I averaged 10 signatures per day for the past 2-3 years? Think of the wasted energy typing those PIN codes every time! Changing the cryptographic key type is required when I import 25519-based keys.
gpg/card> name
Cardholder's surname: Josefsson
Cardholder's given name: Simon

gpg/card> lang
Language preferences: sv

gpg/card> sex
Salutation (M = Mr., F = Ms., or space): m

gpg/card> login
Login data (account name): jas

gpg/card> url
URL to retrieve public key: https://josefsson.org/key-20190320.txt

gpg/card> forcesig

gpg/card> key-attr
Changing card key attribute for: Signature key
Please select what kind of key you want:
   (1) RSA
   (2) ECC
Your selection? 2
Please select which elliptic curve you want:
   (1) Curve 25519
   (4) NIST P-384
Your selection? 1
The card will now be re-configured to generate a key of type: ed25519
Note: There is no guarantee that the card supports the requested size.
      If the key generation does not succeed, please check the
      documentation of your card to see what sizes are allowed.
Changing card key attribute for: Encryption key
Please select what kind of key you want:
   (1) RSA
   (2) ECC
Your selection? 2
Please select which elliptic curve you want:
   (1) Curve 25519
   (4) NIST P-384
Your selection? 1
The card will now be re-configured to generate a key of type: cv25519
Changing card key attribute for: Authentication key
Please select what kind of key you want:
   (1) RSA
   (2) ECC
Your selection? 2
Please select which elliptic curve you want:
   (1) Curve 25519
   (4) NIST P-384
Your selection? 1
The card will now be re-configured to generate a key of type: ed25519

gpg/card>

Reader ...........: 234B:0000:FSIJ-1.2.20-42315277:0
Application ID ...: D276000124010200FFFE423152770000
Application type .: OpenPGP
Version ..........: 2.0
Manufacturer .....: unmanaged S/N range
Serial number ....: 42315277
Name of cardholder: Simon Josefsson
Language prefs ...: sv
Salutation .......: Mr.
URL of public key : https://josefsson.org/key-20190320.txt
Login data .......: jas
Signature PIN ....: not forced
Key attributes ...: ed25519 cv25519 ed25519
Max. PIN lengths .: 127 127 127
PIN retry counter : 3 3 3
Signature counter : 0
KDF setting ......: on
Signature key ....: [none]
Encryption key....: [none]
Authentication key: [none]
General key info..: [none]

gpg/card>
The device is now ready for key import! Bring out your offline laptop and boot it and use the keytocard command on the subkeys to import them. This assumes you saved a copy of the GnuPG home directory after generating the master and subkeys before, which I did in my own previous tutorial when I generated the keys. This may be a bit unusual, and there are simpler ways to do this (e.g., import a copy of the secret keys into a fresh GnuPG home directory).
$ cp -a gnupghome-backup-mastersubkeys gnupghome-import-fst01sz-42315277-2022-12-24
$ ps auxww|grep -e pcsc -e scd
$ gpg --homedir $PWD/gnupghome-import-fst01sz-42315277-2022-12-24 --edit-key B1D2BD1375BECB784CF4F8C4D73CF638C53C06BE
...
Secret key is available.

gpg: checking the trustdb
gpg: marginals needed: 3  completes needed: 1  trust model: pgp
gpg: depth: 0  valid:   1  signed:   0  trust: 0-, 0q, 0n, 0m, 0f, 1u
sec  ed25519/D73CF638C53C06BE
     created: 2019-03-20  expired: 2019-10-22  usage: SC
     trust: ultimate      validity: expired
ssb  cv25519/02923D7EE76EBD60
     created: 2019-03-20  expired: 2019-10-22  usage: E
ssb  ed25519/80260EE8A9B92B2B
     created: 2019-03-20  expired: 2019-10-22  usage: A
ssb  ed25519/51722B08FE4745A2
     created: 2019-03-20  expired: 2019-10-22  usage: S
[ expired] (1). Simon Josefsson <simon@josefsson.org>

gpg> key 1

sec  ed25519/D73CF638C53C06BE
     created: 2019-03-20  expired: 2019-10-22  usage: SC
     trust: ultimate      validity: expired
ssb* cv25519/02923D7EE76EBD60
     created: 2019-03-20  expired: 2019-10-22  usage: E
ssb  ed25519/80260EE8A9B92B2B
     created: 2019-03-20  expired: 2019-10-22  usage: A
ssb  ed25519/51722B08FE4745A2
     created: 2019-03-20  expired: 2019-10-22  usage: S
[ expired] (1). Simon Josefsson <simon@josefsson.org>

gpg> keytocard
Please select where to store the key:
   (2) Encryption key
Your selection? 2

sec  ed25519/D73CF638C53C06BE
     created: 2019-03-20  expired: 2019-10-22  usage: SC
     trust: ultimate      validity: expired
ssb* cv25519/02923D7EE76EBD60
     created: 2019-03-20  expired: 2019-10-22  usage: E
ssb  ed25519/80260EE8A9B92B2B
     created: 2019-03-20  expired: 2019-10-22  usage: A
ssb  ed25519/51722B08FE4745A2
     created: 2019-03-20  expired: 2019-10-22  usage: S
[ expired] (1). Simon Josefsson <simon@josefsson.org>

gpg> key 1

sec  ed25519/D73CF638C53C06BE
     created: 2019-03-20  expired: 2019-10-22  usage: SC
     trust: ultimate      validity: expired
ssb  cv25519/02923D7EE76EBD60
     created: 2019-03-20  expired: 2019-10-22  usage: E
ssb  ed25519/80260EE8A9B92B2B
     created: 2019-03-20  expired: 2019-10-22  usage: A
ssb  ed25519/51722B08FE4745A2
     created: 2019-03-20  expired: 2019-10-22  usage: S
[ expired] (1). Simon Josefsson <simon@josefsson.org>

gpg> key 2

sec  ed25519/D73CF638C53C06BE
     created: 2019-03-20  expired: 2019-10-22  usage: SC
     trust: ultimate      validity: expired
ssb  cv25519/02923D7EE76EBD60
     created: 2019-03-20  expired: 2019-10-22  usage: E
ssb* ed25519/80260EE8A9B92B2B
     created: 2019-03-20  expired: 2019-10-22  usage: A
ssb  ed25519/51722B08FE4745A2
     created: 2019-03-20  expired: 2019-10-22  usage: S
[ expired] (1). Simon Josefsson <simon@josefsson.org>

gpg> keytocard
Please select where to store the key:
   (3) Authentication key
Your selection? 3

sec  ed25519/D73CF638C53C06BE
     created: 2019-03-20  expired: 2019-10-22  usage: SC
     trust: ultimate      validity: expired
ssb  cv25519/02923D7EE76EBD60
     created: 2019-03-20  expired: 2019-10-22  usage: E
ssb* ed25519/80260EE8A9B92B2B
     created: 2019-03-20  expired: 2019-10-22  usage: A
ssb  ed25519/51722B08FE4745A2
     created: 2019-03-20  expired: 2019-10-22  usage: S
[ expired] (1). Simon Josefsson <simon@josefsson.org>

gpg> key 2

sec  ed25519/D73CF638C53C06BE
     created: 2019-03-20  expired: 2019-10-22  usage: SC
     trust: ultimate      validity: expired
ssb  cv25519/02923D7EE76EBD60
     created: 2019-03-20  expired: 2019-10-22  usage: E
ssb  ed25519/80260EE8A9B92B2B
     created: 2019-03-20  expired: 2019-10-22  usage: A
ssb  ed25519/51722B08FE4745A2
     created: 2019-03-20  expired: 2019-10-22  usage: S
[ expired] (1). Simon Josefsson <simon@josefsson.org>

gpg> key 3

sec  ed25519/D73CF638C53C06BE
     created: 2019-03-20  expired: 2019-10-22  usage: SC
     trust: ultimate      validity: expired
ssb  cv25519/02923D7EE76EBD60
     created: 2019-03-20  expired: 2019-10-22  usage: E
ssb  ed25519/80260EE8A9B92B2B
     created: 2019-03-20  expired: 2019-10-22  usage: A
ssb* ed25519/51722B08FE4745A2
     created: 2019-03-20  expired: 2019-10-22  usage: S
[ expired] (1). Simon Josefsson <simon@josefsson.org>

gpg> keytocard
Please select where to store the key:
   (1) Signature key
   (3) Authentication key
Your selection? 1

sec  ed25519/D73CF638C53C06BE
     created: 2019-03-20  expired: 2019-10-22  usage: SC
     trust: ultimate      validity: expired
ssb  cv25519/02923D7EE76EBD60
     created: 2019-03-20  expired: 2019-10-22  usage: E
ssb  ed25519/80260EE8A9B92B2B
     created: 2019-03-20  expired: 2019-10-22  usage: A
ssb* ed25519/51722B08FE4745A2
     created: 2019-03-20  expired: 2019-10-22  usage: S
[ expired] (1). Simon Josefsson <simon@josefsson.org>

gpg> quit
Save changes? (y/N) y
$
Now insert it into your daily laptop and have GnuPG and learn about the new private keys and forget about any earlier locally available card bindings — this usually manifests itself by GnuPG asking you to insert a OpenPGP card with another serial number. Earlier I did rm -rf ~/.gnupg/private-keys-v1.d/ but the scd serialno followed by learn --force is nicer. I also sets up trust setting for my own key.
jas@kaka:~$ gpg-connect-agent "scd serialno" "learn --force" /bye
...
jas@kaka:~$ echo "B1D2BD1375BECB784CF4F8C4D73CF638C53C06BE:6:" | gpg --import-ownertrust
jas@kaka:~$ gpg --card-status
Reader ...........: 234B:0000:FSIJ-1.2.20-42315277:0
Application ID ...: D276000124010200FFFE423152770000
Application type .: OpenPGP
Version ..........: 2.0
Manufacturer .....: unmanaged S/N range
Serial number ....: 42315277
Name of cardholder: Simon Josefsson
Language prefs ...: sv
Salutation .......: Mr.
URL of public key : https://josefsson.org/key-20190320.txt
Login data .......: jas
Signature PIN ....: not forced
Key attributes ...: ed25519 cv25519 ed25519
Max. PIN lengths .: 127 127 127
PIN retry counter : 5 5 5
Signature counter : 3
KDF setting ......: on
Signature key ....: A3CC 9C87 0B9D 310A BAD4  CF2F 5172 2B08 FE47 45A2
      created ....: 2019-03-20 23:40:49
Encryption key....: A9EC 8F4D 7F1E 50ED 3DEF  49A9 0292 3D7E E76E BD60
      created ....: 2019-03-20 23:40:26
Authentication key: CA7E 3716 4342 DF31 33DF  3497 8026 0EE8 A9B9 2B2B
      created ....: 2019-03-20 23:40:37
General key info..: sub  ed25519/51722B08FE4745A2 2019-03-20 Simon Josefsson <simon@josefsson.org>
sec#  ed25519/D73CF638C53C06BE  created: 2019-03-20  expires: 2023-09-19
ssb>  ed25519/80260EE8A9B92B2B  created: 2019-03-20  expires: 2023-09-19
                                card-no: FFFE 42315277
ssb>  ed25519/51722B08FE4745A2  created: 2019-03-20  expires: 2023-09-19
                                card-no: FFFE 42315277
ssb>  cv25519/02923D7EE76EBD60  created: 2019-03-20  expires: 2023-09-19
                                card-no: FFFE 42315277
jas@kaka:~$
Verify that you can digitally sign and authenticate using the key and you are done!
jas@kaka:~$ echo foo|gpg -a --sign|gpg --verify
gpg: Signature made Sat Dec 24 13:49:59 2022 CET
gpg:                using EDDSA key A3CC9C870B9D310ABAD4CF2F51722B08FE4745A2
gpg: Good signature from "Simon Josefsson <simon@josefsson.org>" [ultimate]
jas@kaka:~$ ssh-add -L
ssh-ed25519 AAAAC3NzaC1lZDI1NTE5AAAAILzCFcHHrKzVSPDDarZPYqn89H5TPaxwcORgRg+4DagE cardno:FFFE42315277
jas@kaka:~$
So time to relax and celebrate christmas? Hold on… not so fast! Astute readers will have noticed that the output said ‘PIN retry counter: 5 5 5‘. That’s not the default PIN retry counter for Gnuk! How did that happen? Indeed, good catch and great question, my dear reader. I wanted to include how you can modify the Gnuk source code, re-build it and re-flash the Gnuk as well. This method is different than flashing Gnuk onto a device that is running NeuG so the commands I used to flash the firmware in the start of this blog post no longer works in a device running Gnuk. Fortunately modern Gnuk supports updating firmware by specifying the Admin PIN code only, and provides a simple script to achieve this as well. The PIN retry counter setting is hard coded in the openpgp-do.c file, and we run a a perl command to modify the file, rebuild Gnuk and upgrade the FST-01SZ. This of course wipes all your settings, so you will have the opportunity to practice all the commands earlier in this post once again!
jas@kaka:~/src/gnuk/src$ perl -pi -e 's/PASSWORD_ERRORS_MAX 3/PASSWORD_ERRORS_MAX 5/' openpgp-do.c
jas@kaka:~/src/gnuk/src$ make | less
jas@kaka:~/src/gnuk/src$ cd ../tool/
jas@kaka:~/src/gnuk/tool$ ./upgrade_by_passwd.py
Admin password:
Device:
Configuration: 1
Interface: 0
../regnual/regnual.bin: 4608
../src/build/gnuk.bin: 110592
CRC32: b93ca829

Device:
Configuration: 1
Interface: 0
20002a00:20005000
Downloading flash upgrade program...
start 20002a00
end   20003c00
Run flash upgrade program...
Waiting for device to appear:
  Wait 1 second...
  Wait 1 second...
Device:
08001000:08020000
Downloading the program
start 08001000
end   0801b000
Protecting device
Finish flashing
Resetting device
Update procedure finished
jas@kaka:~/src/gnuk/tool$
Now finally, I wish you all a Merry Christmas and Happy Hacking!
On the shortlist of things to try on my new laptop has been Guix. I have been using Guix on my rsnapshot-based backup server since 2018, and experimented using it on a second laptop but never on my primary daily work machine. The main difference with Guix for me, compared to Debian (or Trisquel), is that Guix follows a rolling release model, even though they prepare stable versioned installation images once in a while. It seems the trend for operating system software releases is to either following a Long-Term-Support approach or adopt a rolling approach. Historically I have found that the rolling release approach, such as following Debian testing, has lead to unreliable systems, since little focus was given to system integration stability. This probably changed in the last 10 years or so, and today add-on systems like Homebrew on macOS gives me access to modern releases of free software easily. While I am likely to stay with LTS releases of GNU/Linux on many systems, the experience with rolling Guix (with unattended-upgrades from a cron job to pull in new code continously) on my backup servers has been smooth: no need for re-installation or debugging of installations for over four years!
I tried the Guix 1.4 rc2 installation image on top of my previous Trisquel 11 installation; following the guided Guix installation menus was simple. I installed using wired network, since the WiFi dongle I had did not automatically become available. I put the Guix system on a separate partition, that I left empty when I installed Trisquel, and mounted the same /home that I used for Trisquel. Everything booted fine, and while I had some issues doing guix pull followed by guix system reconfigure /etc/config.scm I eventually got it working by using --allow-downgrade once. I believe this was a symptom of using a release candidate installation image. Guix did not auto-detect Trisquel or set up a Grub boot menu for it, and I have been unable to come up with the right Guix bootloader magic to add a Trisquel boot item again. Fortunately, the EFI boot choser allows me to boot Trisquel again.
Guix 1.4 uses Linux-libre 6.0 which is newer than Trisquel 11’s Linux-libre 5.15. The WiFi dongle worked automatically once the system was installed. I will continue to tweak the default system configuration that was generated, it seems a standard GNOME installation does not include Evolution on Guix. Everything else I have tested works fine, including closing the lid and suspend and then resume, however the builtin webcam has a distorted image which does not happen on Trisquel. All in all, it seems the resulting system would be usable enough for me. I will be switching between Trisquel and Guix, but expect to spend most of time for daily work within Trisquel because it gives me the stable Debian-like environment that I’ve been used to for ~20 years. Sharing the same /home between Trisquel and Guix may have been a mistake: GNOME handles this badly, and the dock will only contain the lowest-common-denominator of available applications, with the rest removed permanently.
My NovaCustom NV41PZ laptop arrived a couple of days ago, and today I had some time to install it. You may want to read about my purchasing decision process first. I expected a rough ride to get it to work, given the number of people claiming that modern laptops can’t run fully free operating systems. I first tried the Trisquel 10 live DVD and it booted fine including network, but the mouse trackpad did not work. Before investigating it, I noticed a forum thread about Trisquel 11 beta3 images, and being based on Ubuntu 22.04 LTS and has Linux-libre 5.15 it seemed better to start with more modern software. After installing through the live DVD successfully, I realized I didn’t like MATE but wanted to keep using GNOME. I reverted back to installing a minimal environment through the netinst image, and manually installed GNOME (apt-get install gnome) since I prefer that over MATE, together with a bunch of other packages. I’ve been running it for a couple of hours now, and here is a brief summary of the hardware components that works.
Dell 27″ 2560×1440 and Ben-Q PD3220U 3840×1260 works fine
Screen (USB-C)
Via Wavlink USB-C/HDMI port extender: Dell 27″ 2560×1440 and Ben-Q PD3220U 3840×1260
Webcam
Builtin 1MP Camera
Microphone
Intel Alder Lake
Keyboard
ISO layout, all function keys working
Mouse
Trackpad, tap clicking and gestures
Ethernet RJ45
Realtek RTL8111/8168/8411 with r8169 driver
Memory card
O2 Micro comes up as /dev/mmcblk0
Docking station
Wavlink 4xUSB, 2xHDMI, DP, RJ45, …
Connectivity
USB-A, USB-C
Audio
Intel Alder Lake
Hardware components and status
So what’s not working? Unfortunately, NovaCustom does not offer any WiFi or Bluetooth module that is compatible with Trisquel, so the AX211 (1675x) Wifi/Bluetooth card in it is just dead weight. I imagine it would be possible to get the card to work if non-free firmware is loaded. I don’t need Bluetooth right now, and use the Technoetic N-150 USB WiFi dongle when I’m not connected to wired network.
Compared against my X201, the following factors have improved.
Faster – CPU benchmark suggests it is 8 times faster than my old i7-620M. While it feels snappier it is not a huge difference. While NVMe should improve SSD performance, benchmark wise the NVMe 980Pro only seems around 2-3 faster than the SATA-based 860 Evo. Going from 6GB to 64GB is 10 times more memory, which is useful for disk caching.
I’m still unhappy about the following properties with both the NV41PZ and the X201.
CPU microcode is not available under free license.
Intel Mangement Engine is still present in the CPU.
No builtin WiFi/Bluetooth that works with free software.
Some other secondary processors (e.g., disk or screen) may be running non-free software but at least none requires non-free firmware.
Hopefully my next laptop will have improved on this further. I hope to be able to resolve the WiFi part by replacing the WiFi module, there appears to be options available but I have not tested them on this laptop yet. Does anyone know of a combined WiFi and Bluetooth M.2 module that would work on Trisquel?
While I haven’t put the laptop to heavy testing yet, everything that I would expect a laptop to be able to do seems to work fine. Including writing this blog post!