Planning for a new OpenPGP key

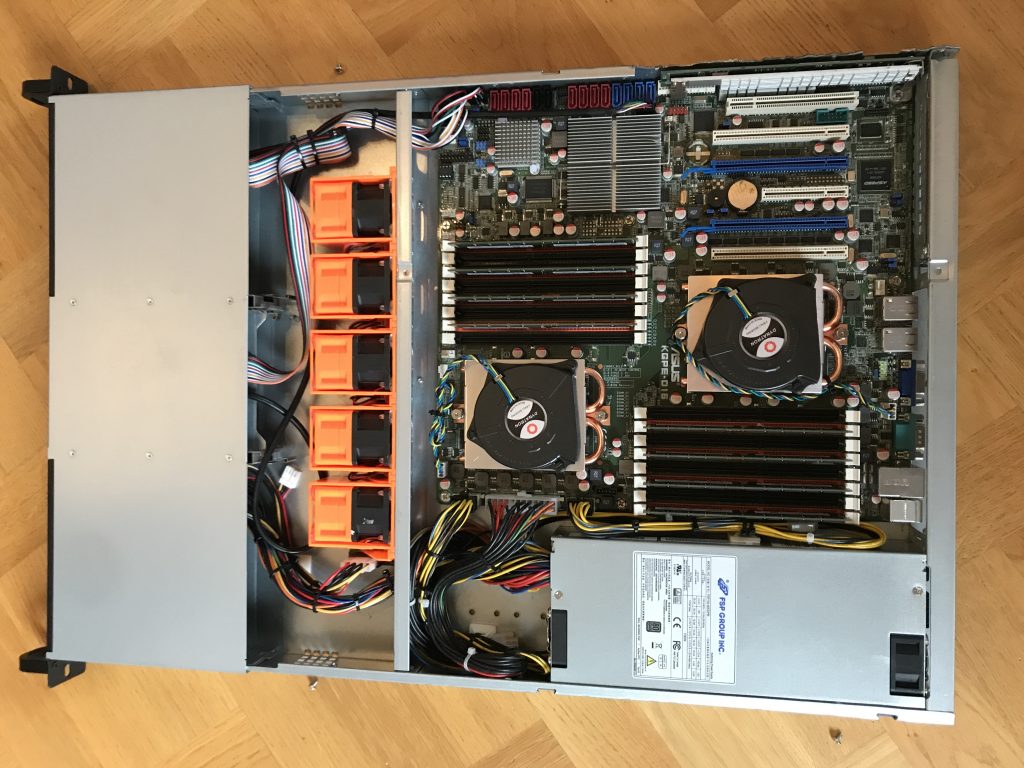
I’m the process of migrating to a new OpenPGP key. I have been using GnuPG with keys stored on external hardware (smartcards) for a long time, and I’m firmly committed to that choice. Algorithm wise, RSA was the best choice back for me when I created my key in 2002, and I used it successfully with a non-standard key size for many years. In 2014 it was time for me to move to a new stronger key, and I still settled on RSA and a non-standard key size. My master key was 3744 bits instead of 1280 bits, and the smartcard subkeys were 2048 bits instead of 1024 bits. At that time, I had already moved from the OpenPGP smartcard to the NXP-based YubiKey NEO (version 3) that runs JavaCard applets. The primary relevant difference for me was the availability of source code for the OpenPGP implementation running on the device, in the ykneo-openpgp project. The device was still a proprietary hardware and firmware design though.

Five years later, it is time for a new key again, and I allow myself to revisit some decisions that I made last time.

GnuPG has supported Curve25519/Ed25519 for some time, and today I prefer it over RSA. Infrastructure has been gradually introducing support for it as well, to the point that I now believe I can cut the ropes to the old world with RSA. Having a offline master key is still a strong preference, so I will stick to that decision. You shouldn’t run around with your primary master key if it is possible to get by with subkeys for daily use, and that has worked well for me over the years.

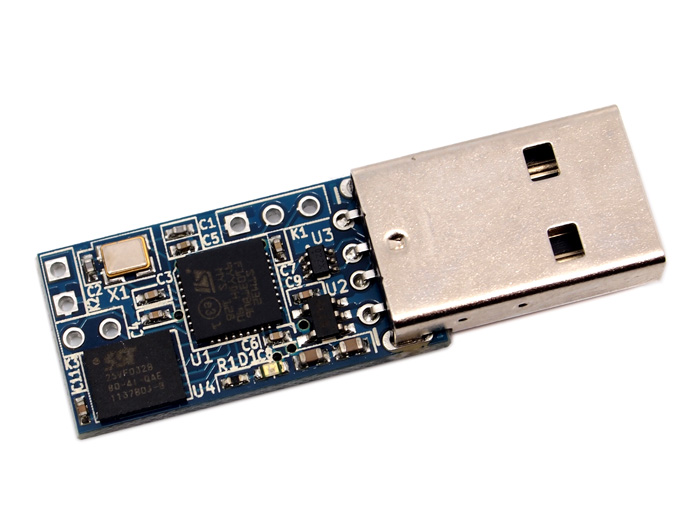
Hardware smartcard support for Curve25519/Ed25519 has been behind software support. NIIBE Yutaka developed the FST-01 hardware device in 2011, and the more modern FST-01G device in 2016. He also wrote the Gnuk software implementation of the OpenPGP card specification that runs on the FST-01 hardware (and other devices). The FST-01 hardware design is open, and it only runs the Gnuk free software. You can buy the FST-01G device from the FSF. The device has not received the FSF Respects Your Freedom stamp, even though it is sold by FSF which seems a bit hypocritical. Hardware running Gnuk are the only free software OpenPGP smartcard that supports Curve25519/Ed25519 right now, to my knowledge. The physical form factor is not as slick as the YubiKey (especially the nano-versions of the YubiKey that can be emerged into the USB slot), but it is a trade-off I can live with. Niibe introduced the FST-01SZ at FOSDEM’19 but to me it does not appear to offer any feature over the FST-01G and is not available for online purchase right now.

I have always generated keys in software using GnuPG. My arguments traditionally was that I 1) don’t trust closed-source RSA key generation implementations, and 2) want to be able to reproduce my setup with a brand new device. With Gnuk the first argument doesn’t hold any longer. However, I still prefer to generate keys with GnuPG on a Linux-based Debian machine because that software stack is likely to receive more auditing than Gnuk. It is a delicated decision though, since GnuPG on Debian is many orders of complexity higher than the Gnuk software. My second argument is now the primary driver for this decision.

I prefer the SHA-2 family of hashes over SHA-1, and earlier had to configure GnuPG for this. Today I believe the defaults have been improved and this is no longer an issue.

Back in 2014, I had a goal of having a JPEG image embedded in my OpenPGP key. I never finished that process, and I have not been sorry for missing out on anything as a result. On the contrary, the size of the key with an embedded image woud have been even more problematic than the already large key holding 4 embedded RSA public keys in it.

To summarize, my requirements for my OpenPGP key setup in 2019 are:

  • Curve25519/Ed25519 algorithms.
  • Master key on USB stick.
  • USB stick only used on an offline computer.
  • Subkeys for daily use (signature, encryption and authentication).
  • Keys are generated in GnuPG software and imported to the smartcard.
  • Smartcard is open hardware and running free software.

Getting this setup up and running sadly requires quite some detailed work, which will be the topic of other posts… stay tuned!

Vikings D16 server first impressions

I have bought a 1U server to use as a virtualization platform to host my personal online services (mail, web, DNS, nextCloud, Icinga, Munin etc). This is the first time I have used a high-end libre hardware device that has been certified with the Respects Your Freedom certification, by the Free Software Foundation. To inspire others to buy a similar machine, I have written about my experience with the machine.

The machine I bought has a ASUS KGPE D16 mainboard with modified (liberated) BIOS. I bought it from Vikings.net. Ordering the server was uneventful. I ordered it with two AMD 6278 processors (the Wikipedia AMD Opteron page contains useful CPU information), 128GB of ECC RAM, and a PIKE 2008/IMR RAID controller to improve SATA speed (to be verified). I intend to use it with two 1TB Samsung 850 SSDs and two 5TB Seagate ST5000, configured in RAID1 mode. I was worried that the SATA controller(s) would not be able handle >2TB devices, which is something I have had bad experiences with older Dell RAID controllers before. The manufacturer wasn’t able to confirm that they would work, but I took the risk and went ahead with the order anyway.

One of the order configuration choices was which BIOS to use. I chose their recommended “Petitboot & Coreboot (de-blobbed)” option. The other choices were “Coreboot (de-blobbed)” and “Libreboot”. I am still learning about the BIOS alternatives, and my goal is to compare the various alternatives and eventually compile my own preferred choice. The choice of BIOS still leaves me with a desire to understand more. Petitboot appears more advanced, and has an embedded real Linux kernel and small rescue system on it (hence it requires a larger 16MB BIOS chip). Coreboot is a well known project, but it appears it does not have a strict FOSS policy so there is non-free code in it. Libreboot is a de-blobbed coreboot, and appears to fit the bill for me, but it does not appear to have a large community around it and might not be as updated as coreboot.

The PIKE2008 controll card did not fit with the 1U case that Vikings.net had found for me, so someone on their side must have had a nice day of hardware hacking. The cooler for one chip had a dent in it, which could imply damage to the chip or mainboard. The chip is close to the RAID controller where they modified the 1U case, so I was worried that some physical force had been applied there.

First impressions of using the machine for a couple of days:

  • The graphical installation of Debian 9.x stretch does not start. There is a X11 stack backtrace on booting the ISO netinst image, and I don’t know how to turn the installer into text mode from within the Petitboot boot menu.
  • Petitboot does not appear to detect a bootable system inside a RAID partition, which I have reported. I am now using a raw ext4 /boot partition on one of the SSDs to boot.
  • Debian 8.x jessie installs fine, since it uses text-mode. See my jessie installation report.
  • The graphical part of GRUB in debian 8.x makes graphics not work anymore, so I can’t see the GRUB screen or interact with the booted Debian installation.
  • Reboot time is around 2 minutes and 20 seconds between rsyslogd shuts down and until it starts again.
  • On every other boot (it is fairly stable at 50%) I get the following kernel log message every other second. The 00:14.0 device is the SBx00 SMBus Controller according to lspci, but what this means is a mystery to me.
    AMD-Vi: Event logged [IO_PAGE_FAULT device=00:14.0 domain=0x000a address=0x000000fdf9103300 flags=0x0030]
    

That’s it for now! My goal is to get Debian 9.x stretch installed on the machine and perform some heavy duty load testing of the machine before putting it into production. Expect an update if I discover something interesting!

Automatic Replicant Backup over USB using rsync

I have been using Replicant on the Samsung SIII I9300 for over two years. I have written before on taking a backup of the phone using rsync but recently I automated my setup as described below. This work was prompted by a screen accident with my phone that caused it to die, and I noticed that I hadn’t taken regular backups. I did not lose any data this time, since typically all content I create on the device is immediately synchronized to my clouds. Photos are uploaded by the ownCloud app, SMS Backup+ saves SMS and call logs to my IMAP server, and I use DAVDroid for synchronizing contacts, calendar and task lists with my instance of ownCloud. Still, I strongly believe in regular backups of everything, so it was time to automate this.

For my use-case, taking backups of the phone whenever I connect it to one of my laptops is sufficient. I typically connect it to my laptops for charging at least every other day. My laptops are all running Debian, but this should be applicable to most modern GNU/Linux system. This is not Replicant-specific, although you need a rooted phone. I thought that automating this would be simple, but I got to learn the ins and outs of systemd and udev in the process and this ended up taking the better part of an evening.

I started out adding an udev rule and a small script, thinking I could invoke the backup process from the udev rule. However rsync would magically die after running a few seconds. After an embarrassing long debugging session, finally I found someone with a similar problem which led me to a nice writeup on the topic of running long-running services on udev events. I created a file /etc/udev/rules.d/99-android-backup.rules with the following content:

ACTION=="add", SUBSYSTEMS=="usb", ENV{ID_SERIAL_SHORT}=="323048a5ae82918b", TAG+="systemd", ENV{SYSTEMD_WANTS}+="android-backup@$env{ID_SERIAL_SHORT}.service"
ACTION=="add", SUBSYSTEMS=="usb", ENV{ID_SERIAL_SHORT}=="4df9e09c25e75f63", TAG+="systemd", ENV{SYSTEMD_WANTS}+="android-backup@$env{ID_SERIAL_SHORT}.service"

The serial numbers correspond to the device serial numbers of the two devices I wish to backup. The adb devices command will print them for you, and you need to replace my values with the values from your phones. Next I created a systemd service to describe a oneshot service. The file /etc/systemd/system/android-backup@.service have the following content:

[Service]
Type=oneshot
ExecStart=/usr/local/sbin/android-backup %I

The at-sign (“@”) in the service filename signal that this is a service that takes a parameter. I’m not enough of an udev/systemd person to explain these two files using the proper terminology, but at least you can pattern-match and follow the basic idea of them: the udev rule matches the devices that I’m interested in (I don’t want this to happen to all random Android devices I attach, hence matching against known serial numbers), and it causes a systemd service with a parameter to be started. The systemd service file describe the script to run, and passes on the parameter.

Now for the juicy part, the script. I have /usr/local/sbin/android-backup with the following content.

#!/bin/bash

DIRBASE=/var/backups/android
export ANDROID_SERIAL="$1"

exec 2>&1 | logger

if ! test -d "$DIRBASE-$ANDROID_SERIAL"; then
    echo "could not find directory: $DIRBASE-$ANDROID_SERIAL"
    exit 1
fi

set -x

adb wait-for-device
adb root
adb wait-for-device
adb shell printf "address 127.0.0.1\nuid = root\ngid = root\n[root]\n\tpath = /\n" \> /mnt/secure/rsyncd.conf
adb shell rsync --daemon --no-detach --config=/mnt/secure/rsyncd.conf &
adb forward tcp:6010 tcp:873
sleep 2
rsync -av --delete --exclude /dev --exclude /acct --exclude /sys --exclude /proc rsync://localhost:6010/root/ $DIRBASE-$ANDROID_SERIAL/
: rc $?
adb forward --remove tcp:6010
adb shell rm -f /mnt/secure/rsyncd.conf

This script warrant more detailed explanation. Backups are placed under, e.g., /var/backups/android-323048a5ae82918b/ for later off-site backup (you do backup your laptop, right?). You have to manually create this directory, as a safety catch to not wildly rsync data into non-existing directories. The script logs everything using syslog, so run a tail -F /var/log/syslog& when setting this up. You may want to reduce verbosity of rsync if you prefer (replace rsync -av with rsync -a). The script runs adb wait-for-device which you rightly guessed will wait for the device to settle. Next adb root is invoked to get root on the device (reading all files from the system naturally requires root). It takes some time to switch, so another wait-for-device call is needed. Next a small rsyncd configuration file is created in /mnt/secure/rsyncd.conf on the phone. The file tells rsync do listen on localhost, run as root, and use / as the path. By default, rsyncd is read-only so the host will not be able to upload any data over rsync, just read data out. Next rsync is started on the phone. The adb forward command forwards port 6010 on the laptop to port 873 on the phone (873 is the default rsyncd port). Unfortunately, setting up the TCP forward appears to take some time, and adb wait-for-device will not wait for that to complete, hence an ugly sleep 2 at this point. Next is the rsync invocation itself, which just pulls in everything from the phone to the laptop, excluding some usual suspects. The somewhat cryptic : rc $? merely logs the exit code of the rsync process into syslog. Finally we clean up the TCP forward and remove the rsyncd.conf file that was temporarily created.

This setup appears stable to me. I can plug in a phone and a backup will be taken. I can even plug in both my devices at the same time, and they will run at the same time. If I unplug a device, the script or rsync will error out and systemd cleans up.

If anyone has ideas on how to avoid the ugly temporary rsyncd.conf file or the ugly sleep 2, I’m interested. It would also be nice to not have to do the ‘adb root’ dance, and instead have the phone start the rsync daemon when connecting to my laptop somehow. TCP forwarding might be troublesome on a multi-user system, but my laptops aren’t. Killing rsync on the phone is probably a good idea too. If you have ideas on how to fix any of this, other feedback, or questions, please let me know!

Laptop decision fatigue

I admit defeat. I have made some effort into researching recent laptop models (see first and second post). Last week I asked myself what the biggest problem with my current 4+ year old X201 is. I couldn’t articulate any significant concern. So I have bought another second-hand X201 for semi-permanent use at my second office. At ~225 USD/EUR, including another docking station, it is an amazing value. I considered the X220-X240 but they have a different docking station, and were roughly twice the price — the latter allowed for a Samsung 850 PRO SSD purchase. Thanks everyone for your advice, anyway!

Laptop indecision

I wrote last month about buying a new laptop and I still haven’t made a decision. One reason for this is because Dell doesn’t seem to be shipping the E7250. Some online shops claim to be able to deliver it, but aren’t clear on what configuration it has – and I really don’t want to end up with Dell Wifi.

Another issue has been the graphic issues with the Broadwell GPU (see the comment section of my last post). It seems unlikely that this will be fixed in time for Debian Jessie. I really want a stable OS on this machine, as it will be a work-horse and not a toy machine. I haven’t made up my mind whether the graphics issue is a deal-breaker for me.

Meanwhile, a couple of more sub-1.5kg (sub-3.3lbs) Broadwell i7’s have hit the market. Some of these models were suggested in comments to my last post. I have decided that the 5500U CPU would also be acceptable to me, because some newer laptops doesn’t come with the 5600U. The difference is that the 5500U is a bit slower (say 5-10%) and lacks vPro, which I have no need for and mostly consider a security risk. I’m not aware of any other feature differences.

Since the last round, I have tightened my weight requirement to be sub-1.4kg (sub-3lbs), which excludes some recently introduced models, and actually excludes most of the models I looked at before (X250, X1 Carbon, HP 1040/810). Since I’m leaning towards the E7250, with the X250 as a “reliable” fallback option, I wanted to cut down on the number of further models to consider. Weigth is a simple distinguisher. The 1.4-1.5kg (3-3.3lbs) models I am aware that of that is excluded are the Asus Zenbook UX303LN, the HP Spectre X360, and the Acer TravelMate P645.

The Acer Aspire S7-393 (1.3kg) and Toshiba Kira-107 (1.26kg) would have been options if they had RJ45 ports. They may be interesting to consider for others.

The new models I am aware of are below. I’m including the E7250 and X250 for comparison, since they are my preferred choices from the first round. A column for maximum RAM is added too, since this may be a deciding factor for me. Higher weigth is with touch screens.

Toshiba Z30-B 1.2-1.34kg 16GB 13.3″ 1920×1080
Fujitsu Lifebook S935 1.24-1.36kg 12GB 13.3″ 1920×1080
HP EliteBook 820 G2 1.34-1.52kg 16GB 12.5″ 1920×1080
Dell Latitude E7250 1.25kg 8/16GB? 12.5″ 1366×768
Lenovo X250 1.42kg 8GB 12.5″ 1366×768

It appears unclear whether the E7250 is memory upgradeable, some sites say max 8GB some say max 16GB. The X250 and 820 has DisplayPort, the S935 and Z30-B has HDMI, and the E7250 has both DisplayPort/HDMI. The E7250 does not have VGA which the rest has. All of them have 3 USB 3.0 ports except for X250 that only has 2 ports. The E7250 and 820 claims NFC support, but Debian support is not given. Interestingly, all of them have a smartcard reader. All support SDXC memory cards.

The S935 has an interesting modular bay which can actually fit a CD reader or an additional battery. There is a detailed QuickSpec PDF for the HP 820 G2, haven’t found similar detailed information for the other models. It mentions support for Ubuntu, which is nice.

Comparing these laptops is really just academic until I have decided what to think about the Broadwell GPU issues. It may be that I’ll go back to a fourth-gen i7 laptop, and then I’ll probably pick a cheap reliable machine such as the X240.